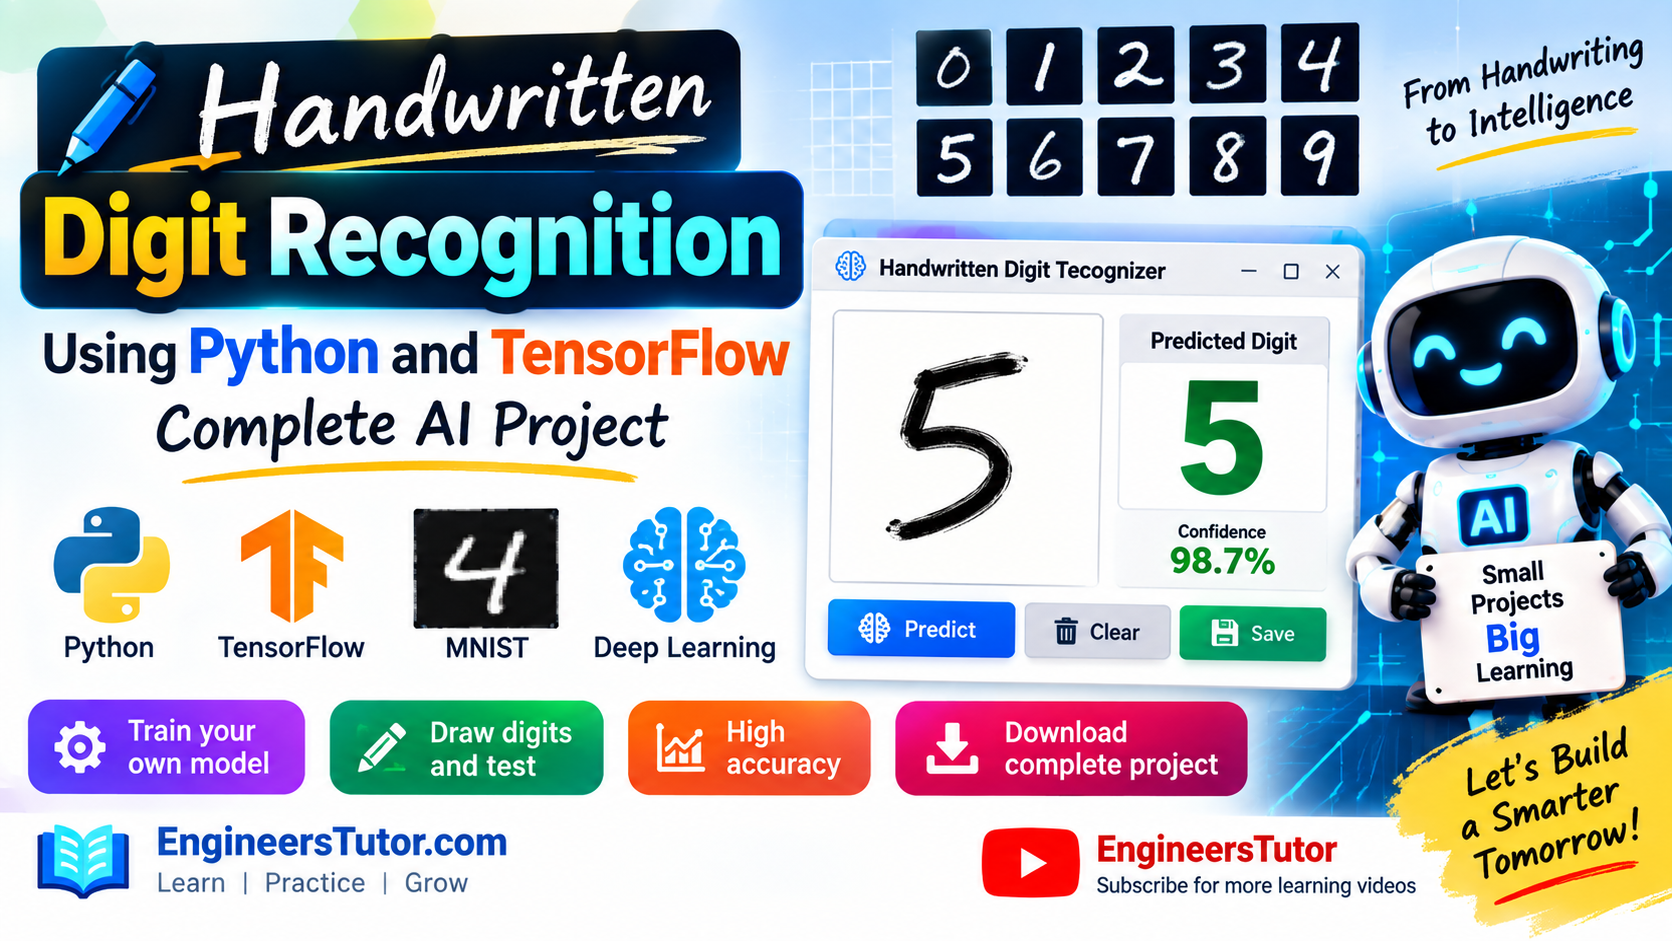
Handwritten Digit Recognition Using Python and TensorFlow – Complete AI Project
Build, train and test an AI-powered handwritten digit recognizer using CNN and the MNIST dataset
1. Introduction
Can a computer recognize a digit written by hand?
In this project, we will build a simple AI-based Handwritten Digit Recognition system using Python and TensorFlow.
The project uses the popular MNIST handwritten digit dataset to train a Convolutional Neural Network (CNN). After training, the model can recognize handwritten digits from 0 to 9.
To make the project easy to try, the completed project includes a pre-trained CNN model. You can download the project files, install the required Python packages, run the program, draw a digit using your mouse, and see what the AI predicts.
If you are interested in understanding how the AI model was created, the same article also explains the training process, including loading the MNIST dataset, building the CNN, training the model, evaluating its performance and saving the trained model.
🎯 2. What Will We Build?
Your drawing is first cleaned and resized to the 28 × 28 pixel format expected by the CNN. The trained model then analyzes the image and predicts the most likely digit. Finally, the application displays the predicted digit along with its confidence score.
🚀 Project goal: Convert a handwritten drawing into an AI prediction using Python, TensorFlow and a Convolutional Neural Network (CNN).
🧰 3. What You Need
🔧 Requirements
- 💻 A Windows computer
- 🐍 Python 3.12
- 🌐 An internet connection for installing the required packages
- 📁 The project files provided with this tutorial
- ⌨️ Basic familiarity with Command Prompt and running Python programs
If you already have another Python version, such as Python 3.14, installed on your computer, you do not need to uninstall it.
For this project, we will specifically use Python 3.12 to create and run the project environment.
During the development of this project, explicitly using Python 3.12 provided a reliable environment for installing TensorFlow and running the complete application. Therefore, we will use the same Python version in this tutorial to make the setup easier and more predictable.
📥 4. Download the Project Files
📦 Download and Extract the Project
📁 The project package contains the trained CNN model, Python programs, and supporting files required to run and understand the handwritten digit recognition application.
handwritten_digit_recognition/
│
├── digit_cnn.keras
├── final_digit_recognizer.py
├── my_digit.png
├── requirements.txt
├── step1_train_cnn.py
├── step2_train_and_save.py
├── step3_drawing_canvas.py
└── my_digit.png
📋 File Description
| 📄 File | 🎯 Purpose |
|---|---|
digit_cnn.keras
|
Pre-trained CNN model |
final_digit_recognizer.py
|
Final handwritten digit recognition application |
requirements.txt
|
Required Python packages |
step1_train_cnn.py
|
CNN training program |
step2_train_and_save.py
|
Training, evaluation and model-saving program |
step3_drawing_canvas.py
|
Drawing canvas for creating a handwritten digit image |
my_digit.png
|
Sample/saved handwritten digit image |
The final recognizer uses the pre-trained
digit_cnn.keras model.
Therefore, if you only want to test the completed application,
you do not need to train the model again.
⭐ 5. Quick Start
Now comes the most exciting part! 🚀 You can test the completed AI application without training the model again.
digit_cnn.keras
model is already included in the project files.
📌 No retraining is required if your goal is simply to run and test the completed application.
🖥️ Step-by-step: Run the HDR Project with Python 3.12
Step 1 — Open the Command Prompt
On Windows, press shortcut key:
A small Run window will appear.
cmd
Then press Enter.
🐍 Step 2 — Check the Installed Python Versions
First, check whether Python 3.12 is installed on your computer.
py -3.12 --version
Press Enter.
Python 3.12.13
You can also check whether another Python installation, such as Python 3.14, is available.
py -3.14 --version
Python 3.14.6
If Python 3.14 is also installed, you do not need to uninstall it.
For this project, use Python 3.12 explicitly in the commands that follow.
🐍 Python 3.12 →
py -3.12
🐍 Python 3.14 →
py -3.14
🧰 Step 3 — Required Python Packages
This HDR project uses the following Python packages:
If Python 3.14 is also installed on your computer, you do not need to uninstall it. Use Python 3.12 explicitly for this project. use commands shown in the beow sections.
Tkinter is normally included with a standard Python installation on Windows. It is used by this project to create the graphical interface and drawing canvas, so you normally do not need to install it separately with pip.
🧠 3.1 Install TensorFlow
In Command Prompt, type:
py -3.12 -m pip install tensorflow
✅ Press Enter and wait for the installation to complete.
🔢 3.2 Install NumPy
Next, install NumPy:
py -3.12 -m pip install numpy
✅ Press Enter and wait for the installation to finish.
🖼️ 3.3 Install Pillow
Install Pillow using:
py -3.12 -m pip install pillow
✅ Press Enter and wait for the installation to finish.
The package is installed using the name
pillow,
but Python programs import it using
PIL.
🖥️ 3.4 Check Tkinter
Tkinter is different from the other packages. On Windows, it is normally included with a standard Python installation, so you usually do not need to install it separately with pip.
🔍 To check whether Tkinter is available, type:
py -3.12 -c "import tkinter; print('Tkinter is working')"
If everything is correct, you should see:
Tkinter is working
🧠 TensorFlow • 🔢 NumPy • 🖼️ Pillow • 🖥️ Tkinter
TensorFlow, NumPy, and Pillow are installed with Python 3.12. Tkinter is checked separately because it normally comes with the standard Windows Python installation.
🔎 6. Verify All Required Packages
After installing the packages, it is a good idea to verify that everything is working correctly with Python 3.12.
py -3.12 -c "import tensorflow as tf; print('TensorFlow:', tf.__version__)"
You should see the installed TensorFlow version, for example:
TensorFlow: 2.x.x
py -3.12 -c "import numpy as np; print('NumPy:', np.__version__)"
✅ A NumPy version number should be displayed.
py -3.12 -c "from PIL import Image; print('Pillow is working')"
✅ You should see: Pillow is working
py -3.12 -c "import tkinter; print('Tkinter is working')"
✅ You should see: Tkinter is working
If all four checks run without an error, your Python 3.12 installation has the main components required for this HDR project.
📁 7. Open the Project Folder in Command Prompt
After downloading the project ZIP file, extract it to a convenient location on your computer.
For example, suppose the project has been extracted to:
G:\Handwritten_Digit_Recognition
Now open
Command Prompt and change to the project folder
using the cd command.
cd /d G:\Handwritten_Digit_Recognition
Press Enter.
You should now see the project folder path at the beginning of the Command Prompt, similar to:
G:\Handwritten_Digit_Recognition>
G:\Handwritten_Digit_Recognition
with the actual location of your project folder.
🔍 Why do we use cd /d?
The cd command is used to change the current folder
in Command Prompt.
The /d option also allows you to change to a
different drive. For example, if Command Prompt is
currently on the C: drive and your
project is on the G: drive,
cd /d
takes you directly to the required folder.
▶️ 8. Run the HDR Application
Before running the application, make sure that:
final_digit_recognizer.py
is present in the project folder.
digit_cnn.keras
is present in the project folder.
🐍 8.1 Check the Python Version
In Command Prompt, type:
py -3.12 --version
Press Enter.
You should see something similar to:
Python 3.12.x
final_digit_recognizer.py.
▶️ 8.2 Run the Final Application
Now start the application using Python 3.12:
py -3.12 final_digit_recognizer.py
Press Enter.
Use your mouse to draw a handwritten digit on the drawing canvas.
Then click Predict.
The trained CNN will process your drawing and display the predicted digit together with its confidence.
digit_cnn.keras
model is already included with the project.
✏️ 9. Draw a Digit
When the application starts, a drawing window will appear. Look for the heading:
🤖 Step 10 — Click Predict
After drawing the digit, click the Predict button.
Digit: 7 Confidence: 98.XX%
The final program compares the prediction probabilities for all ten digit classes and displays the class with the highest probability, together with its corresponding confidence percentage.
🔄 Step 11 — Try Another Digit
Draw another digit and click Predict again.
💡 The Clear button resets the drawing canvas so that you can test another digit.
🎉 Congratulations!
You have successfully run an AI-based Handwritten Digit Recognition system using Python, TensorFlow and a CNN model.
🎓 1. Execute Project With Training
You have now tested the completed application. But an important question remains: Where did the AI model come from?
digit_cnn.keras
contains a trained CNN model.
In the next section, we will go behind the scenes and learn how this model is created using the MNIST handwritten digit dataset and TensorFlow.
You can stop here. The training process is optional if your goal is simply to run and use the completed application.
Continue to the Training Phase below to learn how the CNN is trained, evaluated, and saved for later predictions.
A beginner does not have to spend time training a model before experiencing the result. You can first see the AI application working and then, if interested, learn how the trained model was created.
🎓 2. Training Phase — Build the CNN Model Using MNIST
You have already tested the completed Handwritten Digit Recognition application using the pre-trained digit_cnn.keras model.
But how was this AI model created?
In this section, we will train our own Convolutional Neural Network (CNN) using the MNIST handwritten digit dataset.
Note: Training is optional if you only want to use the completed project. The pre-trained
digit_cnn.kerasfile is already included.
1. What is MNIST?
MNIST is a popular dataset containing handwritten digits from 0 to 9.
Each digit image has a size of:
28 × 28 pixels
The dataset contains:
- 60,000 images for training
- 10,000 images for testing
- 10 possible classes: 0, 1, 2, 3, 4, 5, 6, 7, 8, 9
Our CNN learns patterns from these handwritten images and then uses those patterns to recognize new handwritten digits.
🧠 2. How Does Training Work?
The CNN learns to recognize handwritten digits through a sequence of steps. The overall training process can be represented as:
The CNN learns patterns from thousands of handwritten digit images. After training and evaluation, the trained model is saved as
digit_cnn.keras.
The saved
digit_cnn.keras
file is later loaded by the final recognition program.
This allows the application to make predictions without training
the CNN every time it starts.
3. Training Program
The project contains the following training program:
step1_train_cnn.pyThis program performs the complete CNN training process.
The important stages are:
- Load the MNIST dataset
- Prepare the images
- Build the CNN
- Train the CNN
- Evaluate the model
- Save the trained model
📚 4. Load the MNIST Dataset
Our program uses TensorFlow to load the popular MNIST handwritten digit dataset. MNIST contains images of handwritten digits from 0 to 9 and is commonly used for learning image classification and CNN-based digit recognition.
from tensorflow.keras.datasets import mnist

(x_train, y_train), (x_test, y_test) = mnist.load_data()
Testing data → x_test, y_test
🏷️ y_train and y_test contain the corresponding correct digit labels.
The training set teaches the CNN how handwritten digits look, while the testing set is used later to check how well the trained model recognizes images it has not seen during training.
📊 5. Normalize the Images
MNIST images use grayscale pixel values from 0 to 255. Before sending the images to the CNN, we scale these values to a much smaller range.
x_train = x_train.astype("float32") / 255.0
x_test  = x_test.astype("float32") / 255.0
255
→
Normalized value:
1.0
For example, a pixel value of 128 becomes approximately 0.502.
Neural networks generally work better when input values are kept within a small, consistent range. Scaling the pixel values from 0–255 to 0–1 makes the image data easier for the CNN to process during training.
So every pixel is converted to a value between 0 and 1.
🔲 6. Reshape the Images
The MNIST images are originally stored as 28 × 28 grayscale images. Our CNN also needs to know the image’s channel dimension.
The 1 represents the grayscale image channel. A grayscale image needs only one channel because each pixel contains a single brightness value. A color RGB image, in contrast, normally has three channels.
x_train = x_train.reshape(-1, 28, 28, 1)
x_test  = x_test.reshape(-1, 28, 28, 1)
-1
→ Let Python automatically determine the number of images.
28, 28
→ Height and width of each image.
1
→ One grayscale channel.
Digit
Each MNIST image has the shape 28 × 28 × 1, which provides the CNN with the height, width, and grayscale channel information it expects.
🧠 7. Build the CNN Model
Now we create the Convolutional Neural Network (CNN) that will learn to recognize handwritten digits. The model is built using TensorFlow/Keras.
model = tf.keras.Sequential([
    tf.keras.layers.Input(shape=(28, 28, 1)),

    tf.keras.layers.Conv2D(32, (3, 3), activation="relu"),
    tf.keras.layers.MaxPooling2D(),

    tf.keras.layers.Conv2D(64, (3, 3), activation="relu"),
    tf.keras.layers.MaxPooling2D(),

    tf.keras.layers.Flatten(),

    tf.keras.layers.Dense(128, activation="relu"),
    tf.keras.layers.Dense(10, activation="softmax")
])
📉 MaxPooling2D → Reduces the spatial size while retaining important features.
🔄 Flatten → Converts the extracted feature maps into a one-dimensional vector.
🧠 Dense → Combines the learned features to make the final decision.
🎯 Softmax output → Produces probabilities for the ten digit classes, 0 through 9.
The CNN first extracts visual features from the handwritten image, gradually combines those features, and finally produces a probability for each digit from 0 to 9.
🧠 8. Understanding the CNN Layers
Input(shape=(28, 28, 1))
🖼️ 28 × 28 pixels
⚪ 1 grayscale channel
Conv2D(32, (3, 3), activation="relu")
- Edges
- Curves
- Lines
- Simple shapes
MaxPooling2D()
Conv2D(64, (3, 3), activation="relu")
🎯 This layer uses 64 filters.
MaxPooling2D()
Flatten()
Dense(128, activation="relu")
Dense(10, activation="softmax")
🏆 The digit with the highest probability becomes the model’s prediction.
🖼️ Input → 🔍 Conv2D → 📉 Pooling → 🔍 Conv2D → 📉 Pooling → 🔄 Flatten → 🧠 Dense → 🎯 Output
The early CNN layers learn visual features, the middle layers combine those features, and the final layers use them to decide which digit the image represents.
MaxPooling2D((2, 2))
This reduces the amount of computation while retaining important information about the features detected by the convolution layer.
Conv2D(64, (3, 3), activation="relu")
🔍 It can learn more complex patterns by combining features detected by the earlier convolution layer.
Flatten()
🔗 This allows the extracted features to be passed to the fully connected Dense layers that perform the final classification.
🔍 Conv2D → 📉 MaxPooling → 🔍 Conv2D → 📉 MaxPooling → 🔄 Flatten → 🧠 Dense
After Flatten converts the learned features into a one-dimensional vector, the Dense layers use those features to determine which digit is most likely.
Dense(128, activation="relu")
🔗 It contains 128 neurons and combines the learned features to help determine which digit is present.
Dense(10, activation="softmax")
In this example, digit 3 has the highest probability: 0.91 (91%).
Predicted Digit: 3
The CNN doesn’t simply say “this is a 3.” It first produces probabilities for all ten digits. The final program selects the digit with the highest probability and displays it as the prediction.
⚙️ 9. Compile the Model
Before training begins, the CNN must be compiled. Compilation tells TensorFlow how the model should learn, how its errors should be measured, and what performance information should be reported.
model.compile(
    optimizer="adam",
    loss="sparse_categorical_crossentropy",
    metrics=["accuracy"]
)
| Setting | Purpose |
|---|---|
adam
|
Optimizer that adjusts the model’s weights during training. |
sparse_categorical_crossentropy
|
Loss function used to measure how far the predictions are from the correct digit labels. |
accuracy
|
Measures how many digit predictions are correct. |
🤖 Optimizer → How the model updates itself
📉 Loss → How the model measures its mistakes
📊 Accuracy → How well the model is performing
model.fit().
🎯 10. Train the CNN
The model is now built and compiled. The next step is to let the CNN learn from the MNIST training images.
model.fit(
    x_train,
    y_train,
    epochs=5,
    validation_data=(x_test, y_test)
)
y_train → Correct digit labels
epochs=5 → Train the CNN for five training cycles
x_test, y_test → Images and labels used for validation
One epoch means the model has gone through the training dataset once. In this project, 5 epochs means the CNN gets five training cycles to improve its ability to recognize handwritten digits.
Epoch 1/5
...
accuracy: ...
val_accuracy: ...

Epoch 2/5
...
accuracy: ...
val_accuracy: ...
accuracy → Accuracy measured on the training images.
val_accuracy → Accuracy measured on the validation images.
Epoch 1/5 → The first of five training cycles.
The CNN compares its predictions with the correct digit labels, calculates the error, and adjusts its internal weights. This process is repeated across the training data so that the model gradually becomes better at recognizing handwritten digits.
digit_cnn.keras.
This is done in the model evaluation step.
11. Evaluate the Trained Model
After training, the program evaluates the CNN using the test dataset:
test_loss, test_accuracy = model.evaluate(x_test, y_test)The test dataset contains images that were not used to train the model.
This gives us an indication of how well the CNN can recognize previously unseen handwritten digits.
💾 12. Save the Trained Model
Once training is complete, we save the trained CNN so that it can be used later without training the model again.
digit_cnn.keras
model.save("digit_cnn.keras")
Training a CNN takes time. Once the model has learned how to recognize handwritten digits, there is no need to train it again every time we want to use the application.
💡 We can simply load the saved model and use it to make predictions.
The training program creates
digit_cnn.keras.
The final recognition program loads this file and uses the learned CNN to recognize a digit drawn by the user.
13. How to Train the Model Yourself
If you want to train the CNN yourself, make sure your virtual environment is activated.
From the project folder, run:
python step1_train_cnn.pyThe training process will begin.
You will see the training progress in the terminal.
After training is completed, the program creates:
digit_cnn.kerasin the project folder.
Important: You do not need to run both
step1_train_cnn.pyandstep2_train_and_save.py. They are alternative training programs. For this tutorial,step1_train_cnn.pyis sufficient.
14. Training vs Using the Pre-Trained Model
There are two ways to use this project.
⭐ Option 1 — Just Run the Completed Project
Use the supplied:
digit_cnn.kerasand run:
py -3.12 final_digit_recognizer.pyThis is the Quick Start method.
🎓 Option 2 — Train the CNN Yourself
Run:
py -3.12 step1_train_cnn.pyThe program trains the CNN and creates a new:
digit_cnn.kerasYou can then run:
py -3.12 final_digit_recognizer.pyThis method is useful if you want to understand how the AI model is created.
🔄 15. Alternative Training Program
The project also includes an alternative training program:
step2_train_and_save.py
py -3.12 step1_train_cnn.py
py -3.12 step2_train_and_save.py
Both scripts are intended to perform the training workflow. Choose one of them when you want to experiment with model training.
If you simply want to understand and reproduce the complete training workflow, use
step2_train_and_save.py.
It trains the CNN, evaluates it, and saves the resulting
digit_cnn.keras
model for use by the final recognizer.
Training program → 💾 digit_cnn.keras → 🖥️ Final Digit Recognizer
Once the model has been saved, you do not need to train it again just to run the final application.
🔄 17. What Happens After Training?
Once training is complete, the project has a trained AI model that can be reused to recognize new handwritten digits.
digit_cnn.keras
Your drawing is not immediately ready for the CNN. The program prepares it in the same general format used during training — including resizing it to 28 × 28, converting it to the required grayscale format, and scaling the pixel values.
The model has already learned from the MNIST dataset. Now your own drawing becomes the input, and the trained CNN uses what it learned to make a prediction.
🎨 Step 3 — Drawing Canvas
Now that we understand how the CNN is trained, let’s look at the drawing canvas included in the project. It provides a simple way to create a handwritten digit using your mouse.
step3_drawing_canvas.py
✏️ 1. What Does the Drawing Canvas Do?
The drawing canvas provides a simple digital space where you can create a handwritten digit. The drawing can then be saved as an image for further processing.
my_digit.png
The complete recognition process requires the drawing to be preprocessed into the format expected by the trained CNN before prediction.
🎨 Drawing Canvas → 🖼️ Image → ⚙️ Preprocessing → 🧠 Trained CNN → 🎯 Prediction
▶️ 2. Run the Drawing Canvas
Make sure your virtual environment is activated.
From the project folder, run:
python step3_drawing_canvas.py
🖱️ Use your mouse to draw a digit on the canvas.
✏️ 3. Drawing the Digit
Use the mouse like a pen and draw a digit on the canvas.
For example:
🎯 Try to make the digit reasonably clear and centered on the canvas.
🔬 You can experiment with different handwriting styles. This is one of the interesting parts of the project: seeing how the trained AI model responds to your own handwritten input.
🧹 4. Clear the Canvas
If you make a mistake or want to draw a different digit, click:
This removes the current drawing so you can start again with a fresh canvas.
💾 5. Save the Drawing
After drawing your digit, click:
The program saves the drawing as:
my_digit.png
📁 The image is saved in the project folder.
Handwritten_Digit_Recognition/
│
├── digit_cnn.keras
├── final_digit_recognizer.py
├── my_digit.png
├── requirements.txt
├── step1_train_cnn.py
├── step2_train_and_save.py
└── step3_drawing_canvas.py
my_digit.png.
⭐ 6. Important: my_digit.png Is Optional
There is an important distinction between the drawing canvas program and the final recognizer.
step3_drawing_canvas.py
my_digit.png
final_digit_recognizer.py
my_digit.png
to start the application.
py -3.12 final_digit_recognizer.py
You do not have to run Step 3 first.
If your goal is simply to test the completed AI application, you can run
final_digit_recognizer.py
directly.
📄 my_digit.png → Saved drawing image (optional)
🤖 final_digit_recognizer.py → Complete interactive digit recognizer
🚀 7. The Final Application Is More Convenient
The final application combines the drawing and digit recognition process into a single interactive program.
digit_cnn.keras
You don’t need to create a separate image with the drawing canvas first. The final application provides its own canvas, preprocesses your drawing, sends it to the trained CNN, and immediately displays the prediction.
python final_digit_recognizer.py
The final recognizer already contains the drawing canvas, so you can start the application directly as long as the trained digit_cnn.keras file is available.
🖼️ 8. What Happens to Your Drawing?
When you draw a digit in the final application, the program does not simply send the raw 400 × 400 drawing directly to the CNN.
The CNN was trained using 28 × 28 MNIST images. Your drawing starts as a much larger image, so it must be converted into a compatible format before the CNN can make a prediction.
✏️ Your drawing is converted into the same general image format the CNN learned from during training.
🤖 Only after this conversion is the image passed to the trained model for digit recognition.
🎯 9. Predict the Digit
Once your drawing has been preprocessed, it is passed to the trained CNN. The model produces a probability for each of the 10 possible digits, from 0 to 9.
The CNN calculates a probability for every digit. The program then selects the digit with the highest probability as its prediction.
Confidence: 98%
The confidence value represents the model’s predicted probability for the selected digit. A higher value means the model assigned a stronger probability to that particular class.
The exact value can vary depending on the digit you draw, the way you write it, and how closely the drawing resembles patterns learned from the MNIST dataset.
It receives the preprocessed image of your handwritten digit and calculates probabilities for all ten digit classes.
For a quick classroom, lab, or personal demonstration, you only need to run the completed recognizer.
python final_digit_recognizer.py
Try several digits and different handwriting styles. This makes the demonstration more interesting and lets you observe how the model’s prediction and confidence can change.
✏️ Draw → 🎯 Predict → 📊 Check Confidence → 🧹 Clear → 🔄 Try Again
🎯 What We Have Built
At this point, we have covered the complete practical workflow of our handwritten digit recognition project — from training the CNN to recognizing a digit drawn by the user.
digit_cnn.keras
The final application then allows you to draw a new digit, preprocesses the drawing, and sends it through the trained CNN to obtain a prediction.
We have gone from training an AI model to building an interactive application that can recognize your own handwritten digits.
🛠️ Common Problems and Solutions
If you encounter an error while setting up or running the project, check the common problems below before troubleshooting further.
| ⚠️ Problem | 💡 Solution |
|---|---|
| TensorFlow installation fails | Use Python 3.12 for this project and install the packages inside the project’s virtual environment. |
| Wrong Python version is being used |
Create the virtual environment specifically with
Python 3.12:
py -3.12 -m venv .venv
|
No module named tensorflow
|
Activate .venv and install the
project requirements:
python -m pip install -r requirements.txt
|
No module named PIL
|
Install Pillow:
python -m pip install pillow
|
| Model file not found |
Make sure
digit_cnn.keras
is in the same project folder as
final_digit_recognizer.py.
|
| Drawing application does not open | Make sure you are using a standard Windows Python installation with Tkinter available. |
If you have both Python 3.12 and Python 3.14 installed on your computer, you do not need to uninstall Python 3.14.
This project should use a virtual environment created with Python 3.12.
If something is not working, first activate the virtual environment and run:
python --version
Python 3.12.x