How to Run Python Programs using VS Code – Complete Beginner’s Guide
Learn how to download and install VS Code, install the Python extension, create your first Python file, run a program, and view the output — step by step with screenshots. In the previous tutorial, we learned how to install Python on Windows. The next step is to learn how to write and run Python programs.
In this tutorial, we will use Visual Studio Code (VS Code), one of the most popular code editors used by programmers and developers.
Don’t worry if you have never used VS Code before. We will go step by step—from downloading VS Code to writing your first Python program and viewing its output.
🐍 1. Introduction
Ready to write and run your first Python program in Visual Studio Code (VS Code)? 💻✨
In this beginner-friendly guide, we’ll go step by step — from downloading VS Code to writing Python code and finally seeing your output. 🎉
No complicated setup, no programming experience required — just follow along and start coding with confidence! 🚀
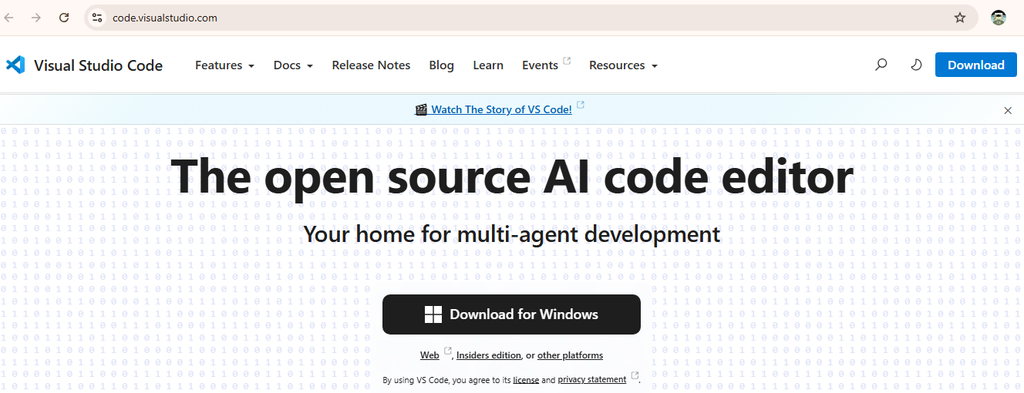
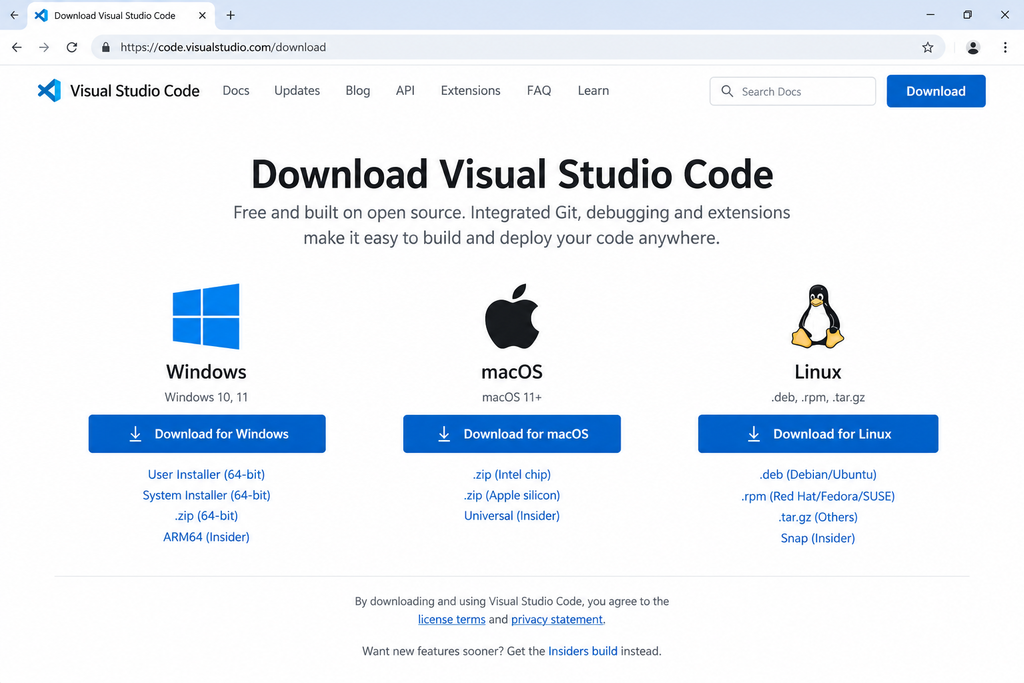
📸 Official Visual Studio Code download page — click Download for Windows to download VS Code.
🛠️ What You Need Before Starting
Before we begin, make sure Python is already installed on your computer. 🐍💻
That’s all you need for now! We’ll install VS Code and its Python support step by step in this tutorial. 🚀
💻 What is Visual Studio Code?
Visual Studio Code (VS Code) is a free and powerful code editor developed by Microsoft. It helps you write, edit, and run programs in languages such as Python, C, C++, Java and many more.
For Python beginners, VS Code provides a friendly environment where you can write code → run it → see the output — all in one place! 🚀🐍
🖥️ VS Code Interface
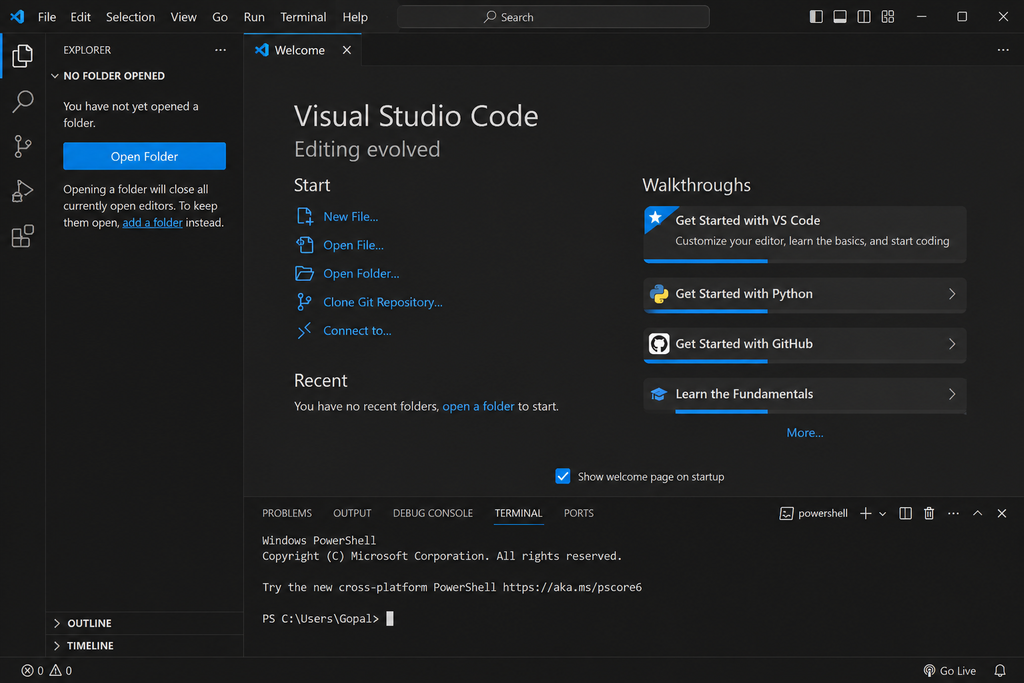
When you open VS Code for the first time, you will see several useful areas such as the Explorer, Editor, and Terminal. Don’t worry — we’ll use each of them step by step while creating and running our Python programs. 🐍💻✨
⬇️ 2. Download Visual Studio Code
First, download Visual Studio Code from the official website. Look for the Download for Windows button and click it to start the download. 💻✨
📥 Step 3: Download the Installer
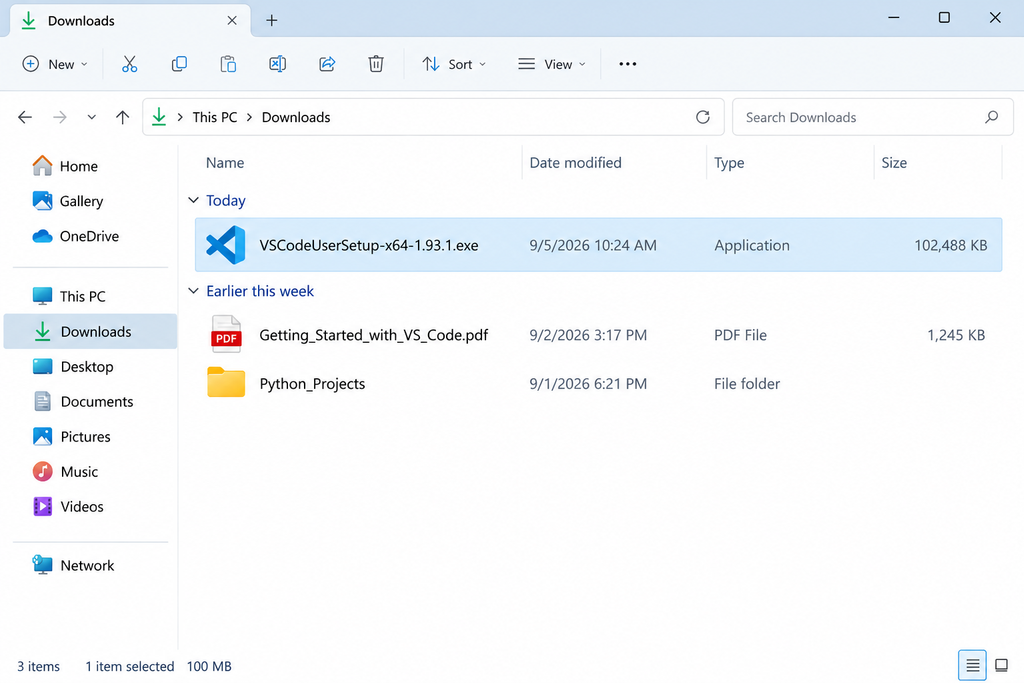
After clicking Download for Windows, the VS Code installer will be downloaded to your computer. Look for the downloaded .exe file in your Downloads folder. 📁💻
💻 4. Install VS Code on Windows
The VS Code installer is now ready. 📥 In the following steps, we will install Visual Studio Code on Windows and prepare it for writing and running Python programs. 🐍✨
🚀 Step 1: Start the Installer
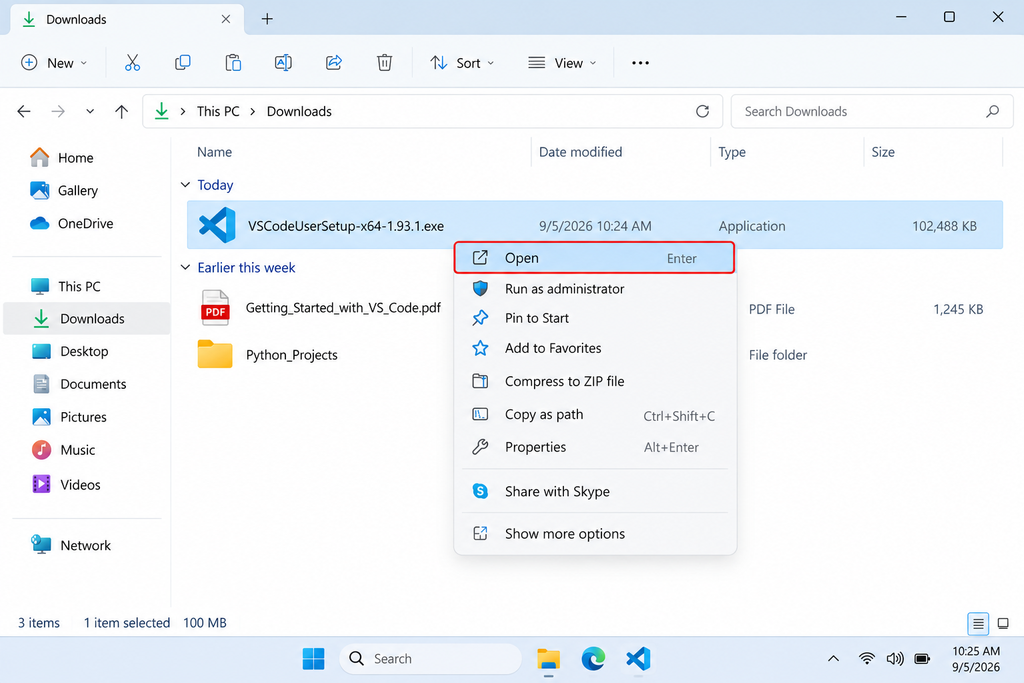
Open your Downloads folder and locate the VS Code installer. Double-click the .exe file to start the installation. 💻✨
📜 Step 2: Accept the License Agreement
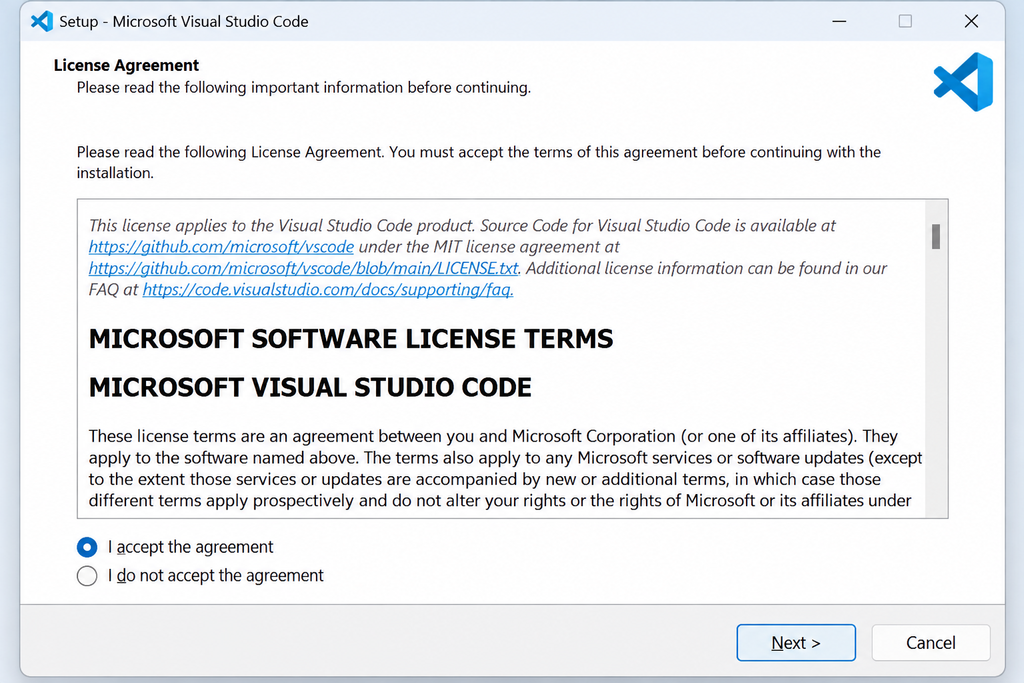
The VS Code Setup window will now display the License Agreement. Select “I accept the agreement” and click Next to continue. 👍💻
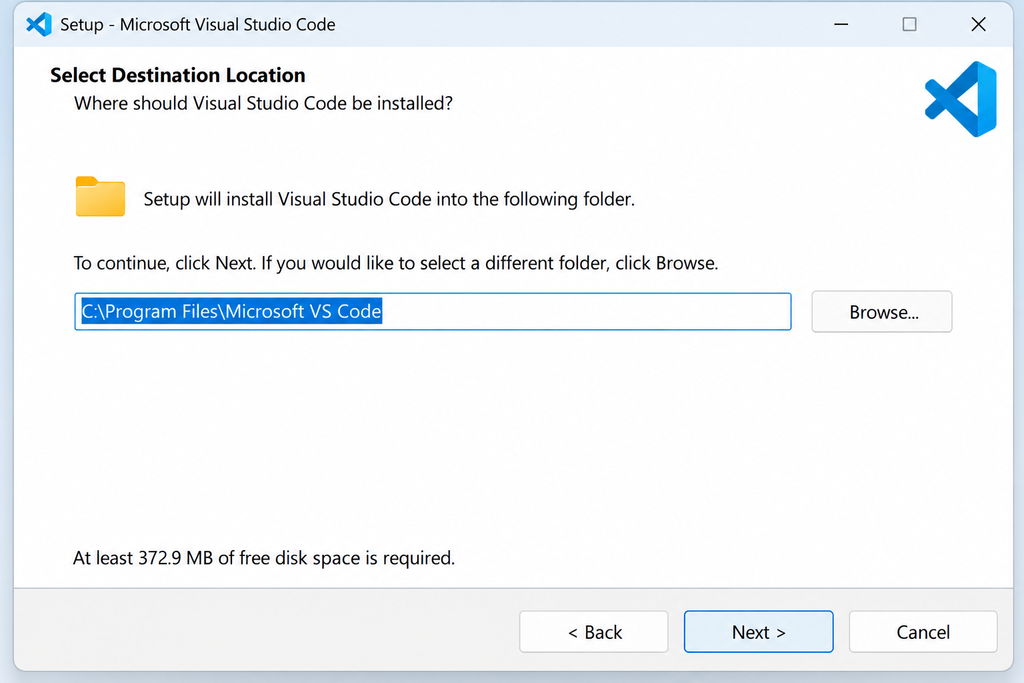
📁 Step 3: Choose the Installation Location
VS Code will ask where you want to install the program. For most beginners, the default location is perfectly fine. Simply click Next to continue. 👍💻
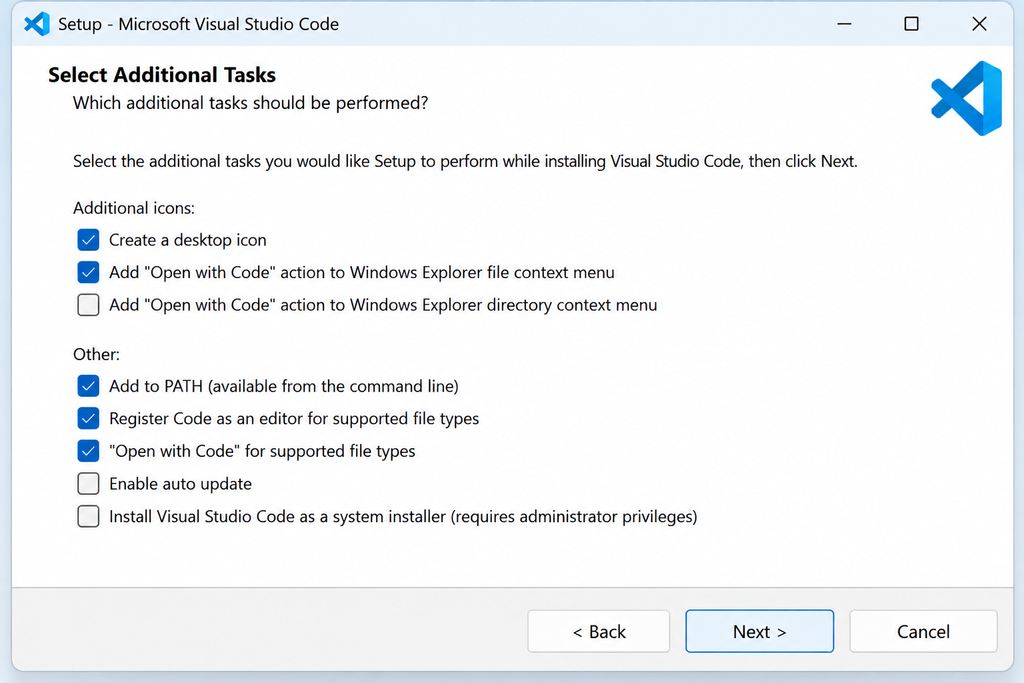
⚙️ Step 4: Select Additional Tasks
VS Code will now show some additional installation options. For beginners, it is recommended to keep the useful options selected, especially Add to PATH.
Review the options and click Next to continue with the installation. 🚀💻
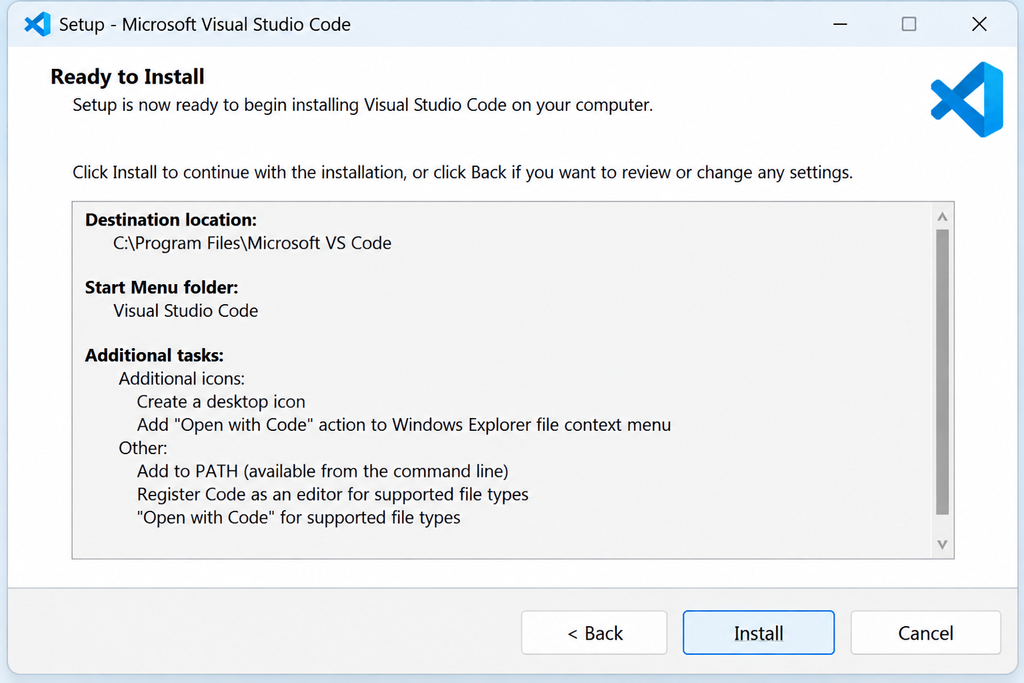
🚀 Step 5: Install VS Code
You are almost there! 🎉 On the Ready to Install screen, click the Install button to begin installing VS Code on your computer. 💻✨
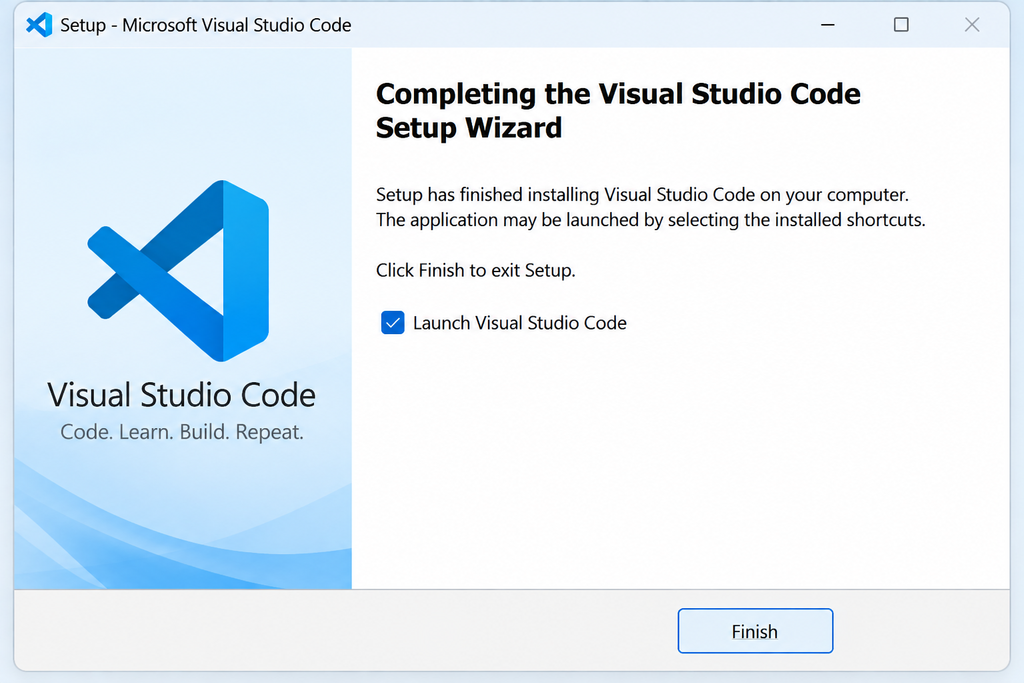
🎉 Step 6: Finish Installation
Once the installation is complete, you will see the Installation Complete screen. Click Finish to close the installer and launch VS Code. 🚀💻
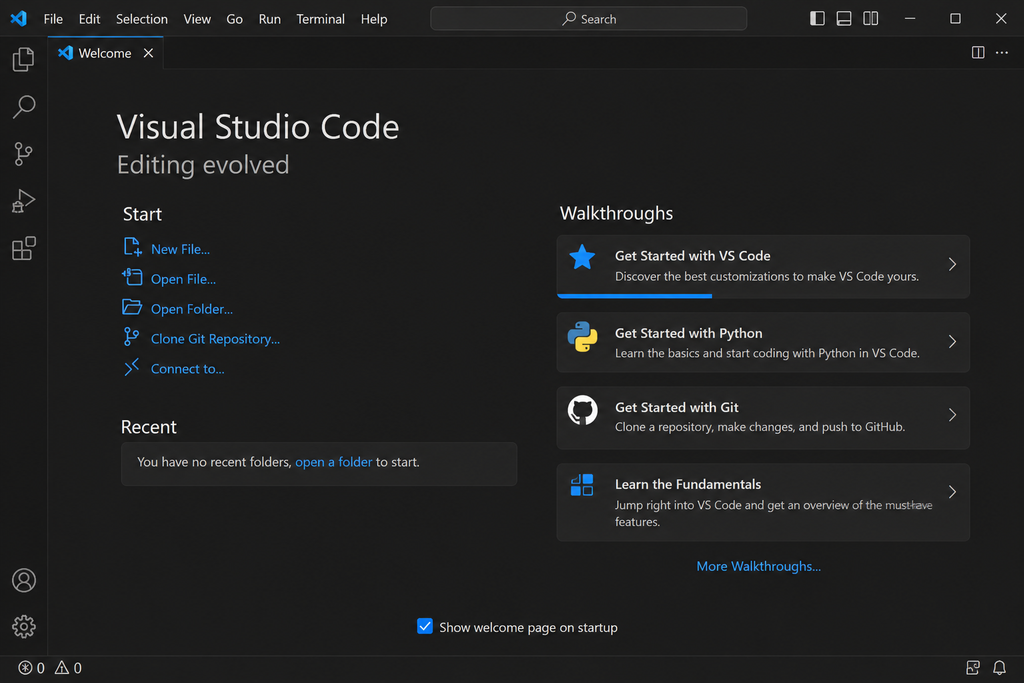
🖥️ 5. Open Visual Studio Code for the First Time
VS Code is now installed! 🎉 Open Visual Studio Code from the Start Menu or desktop shortcut. You will see the VS Code Welcome screen, where we will begin setting up our Python programming environment. 🐍💻
🐍 6. Install the Python Extension in VS Code
To write and run Python programs comfortably in VS Code, we need to install the Python extension. It adds useful Python features such as code assistance, running programs, debugging, and interpreter selection. 💻✨
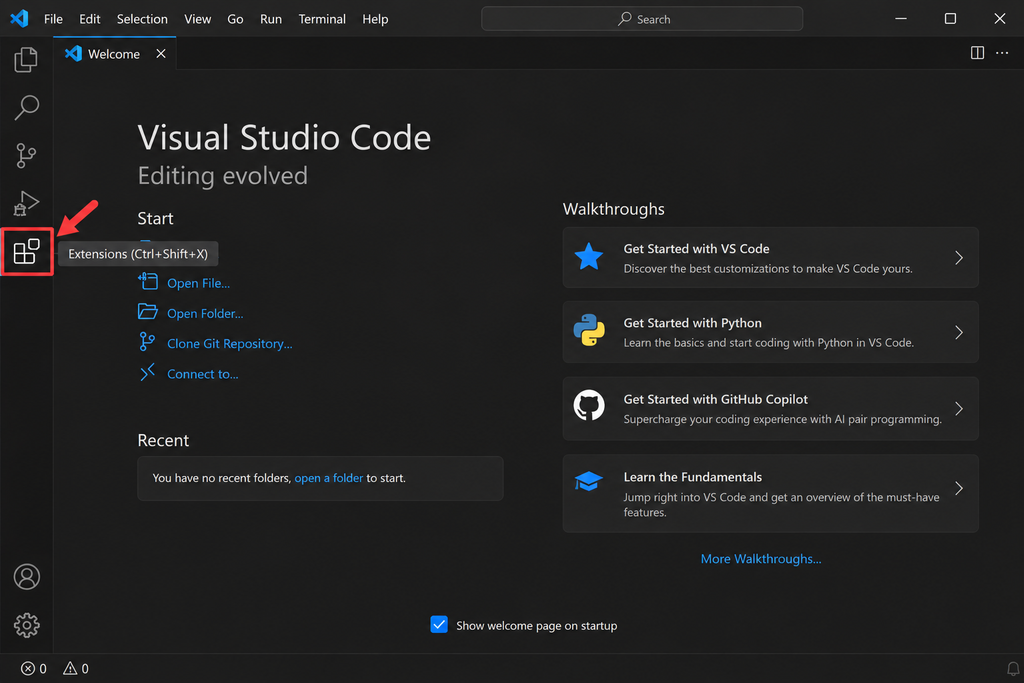
🧩 Step 1: Open Extensions
In VS Code, look at the Activity Bar on the left side and click the Extensions icon 🧩. This is where you can search for and install extensions that add useful features to VS Code.
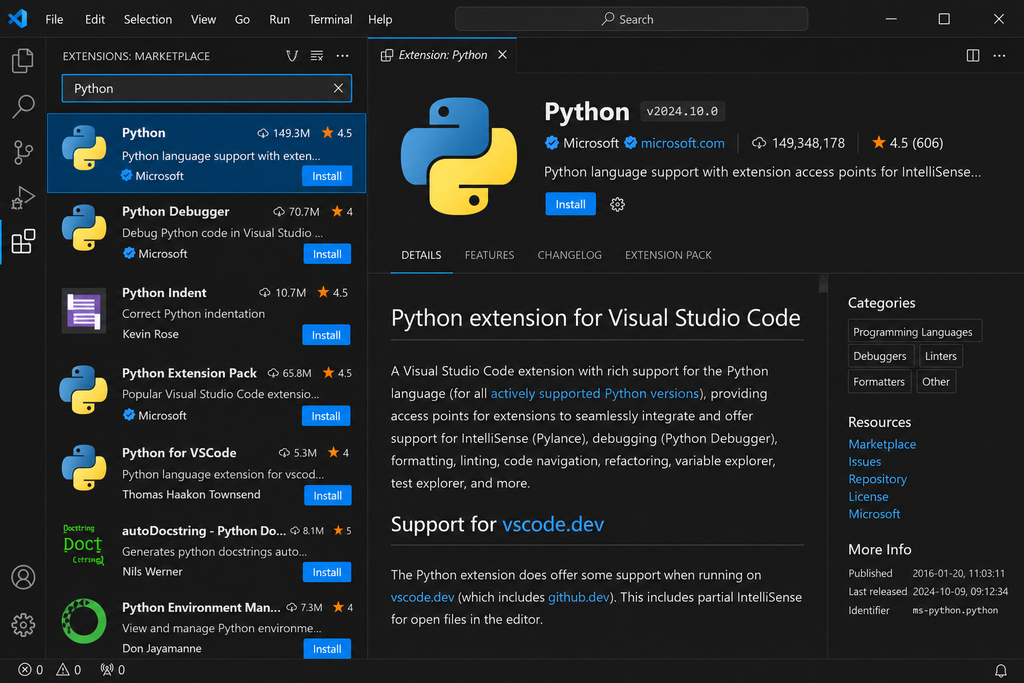
🔍 Step 2: Search for Python
In the Extensions panel, type Python in the search box. 🔎 Look for the official Python extension to continue with the setup. 🐍✨
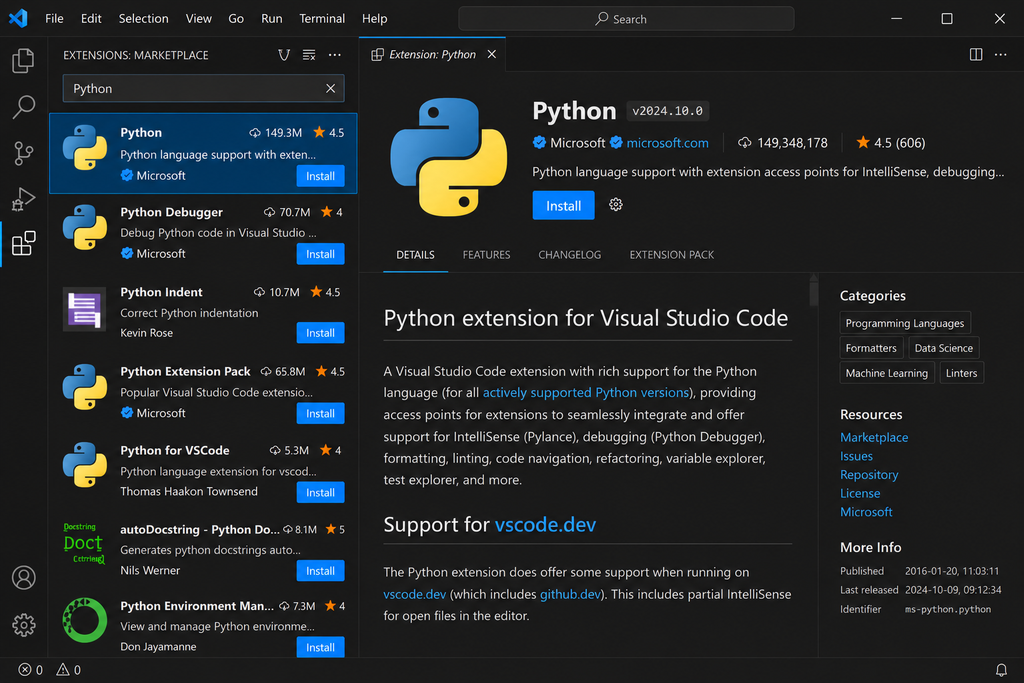
🐍 Step 3: Install the Python Extension
Select the official Python extension published by Microsoft. Then click the Install button. In a few moments, Python support will be ready in VS Code! 🎉💻
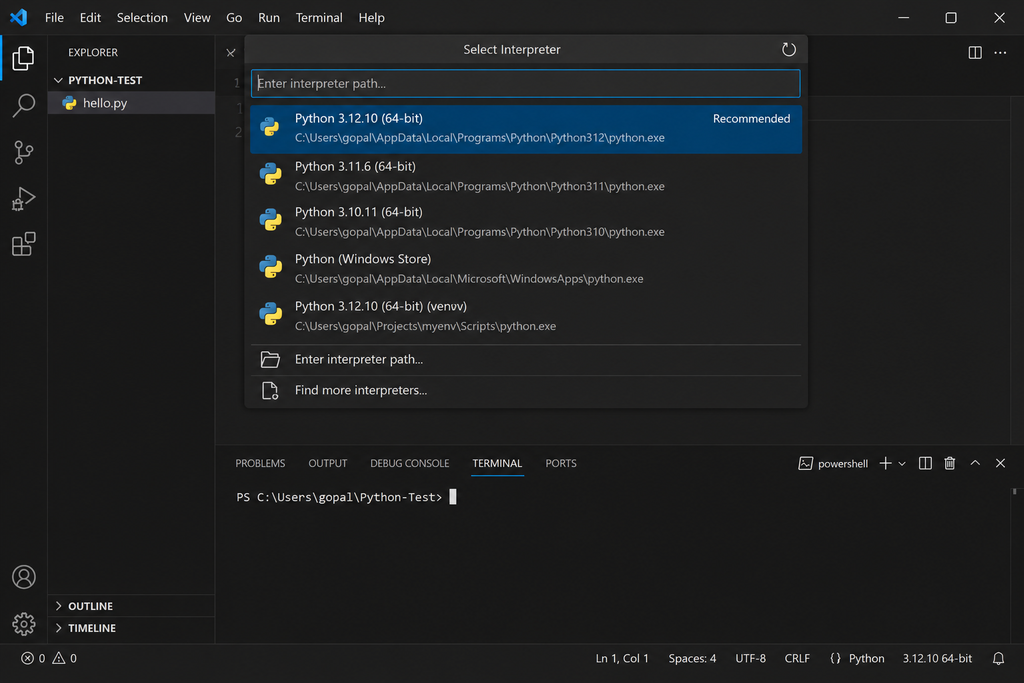
🐍 Step 4: Select the Python Interpreter
VS Code needs to know which Python installation you want to use. Open the Command Palette with Ctrl + Shift + P and search for Python: Select Interpreter.
Select the Python version you installed on your computer. Once selected, VS Code will use this interpreter to run your Python programs. 🚀💻
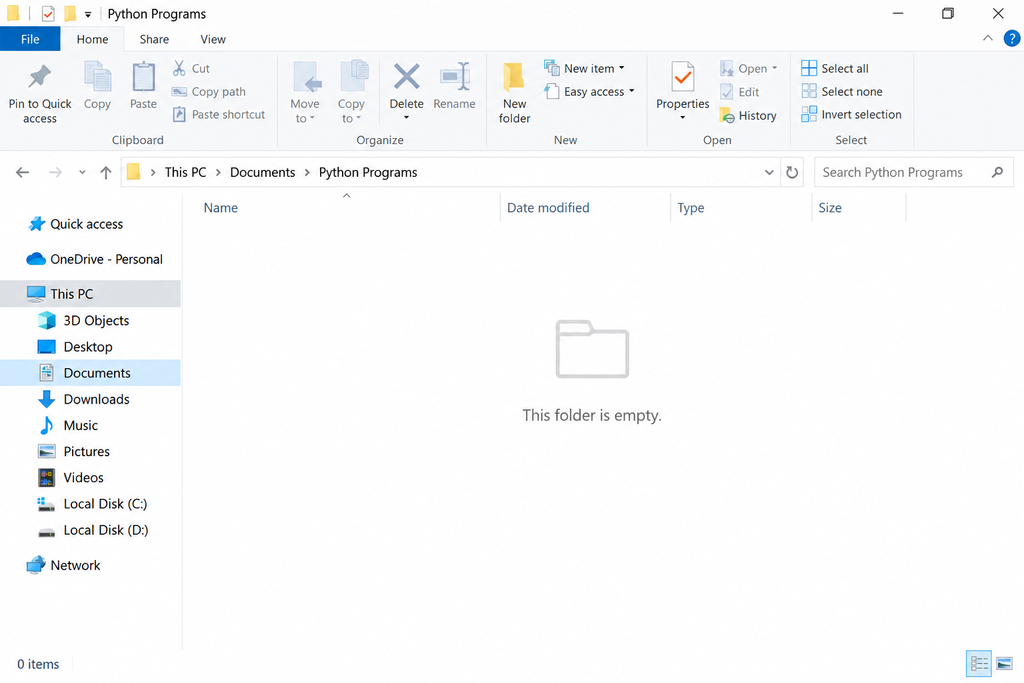
📁 Step 7: Create a Folder for Python Programs
Before writing our first program, let’s create a dedicated folder to keep our Python files organized. 💻📂 You can create a folder such as Python Programs in a convenient location on your computer.
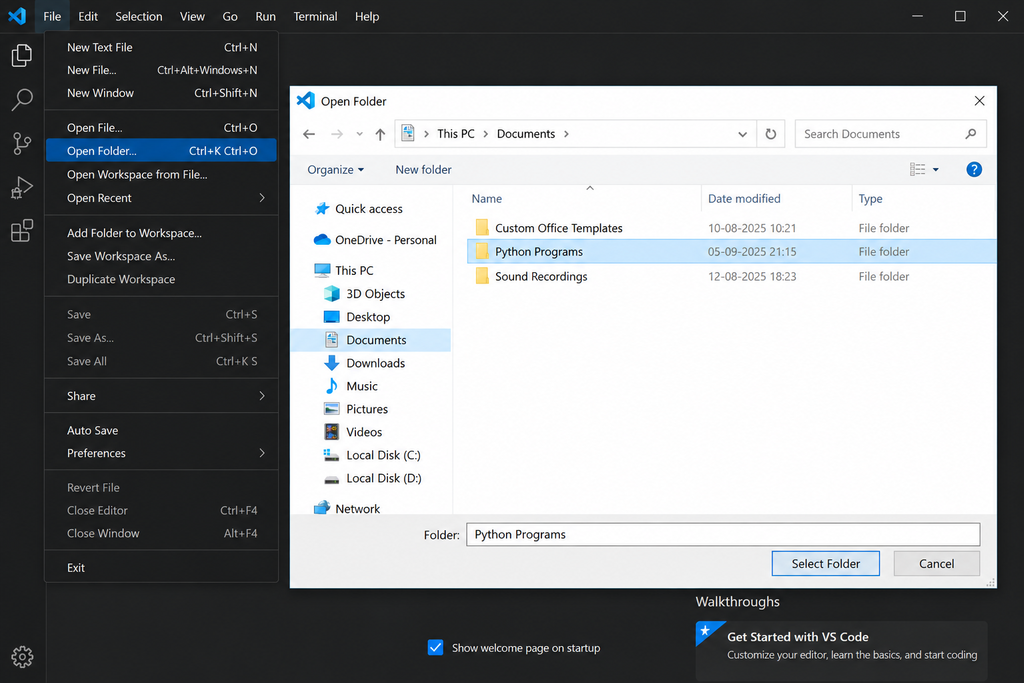
📂 Step 8: Open the Folder in VS Code
Now let’s open our Python Programs folder in VS Code. Click File → Open Folder, select the folder you created, and click Select Folder. 📁💻
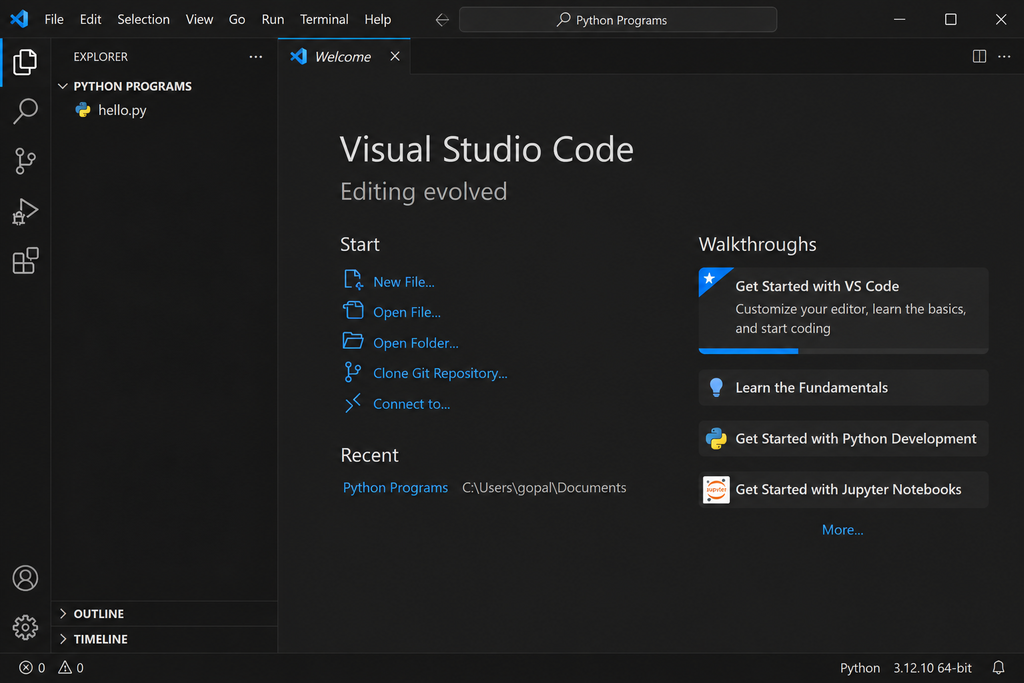
🐍 9. Create Your First Python Program
Everything is ready! 🎉 Now let’s write our very first Python program in VS Code. We will create a simple program, save it as a .py file, and run it to see the output. 💻✨
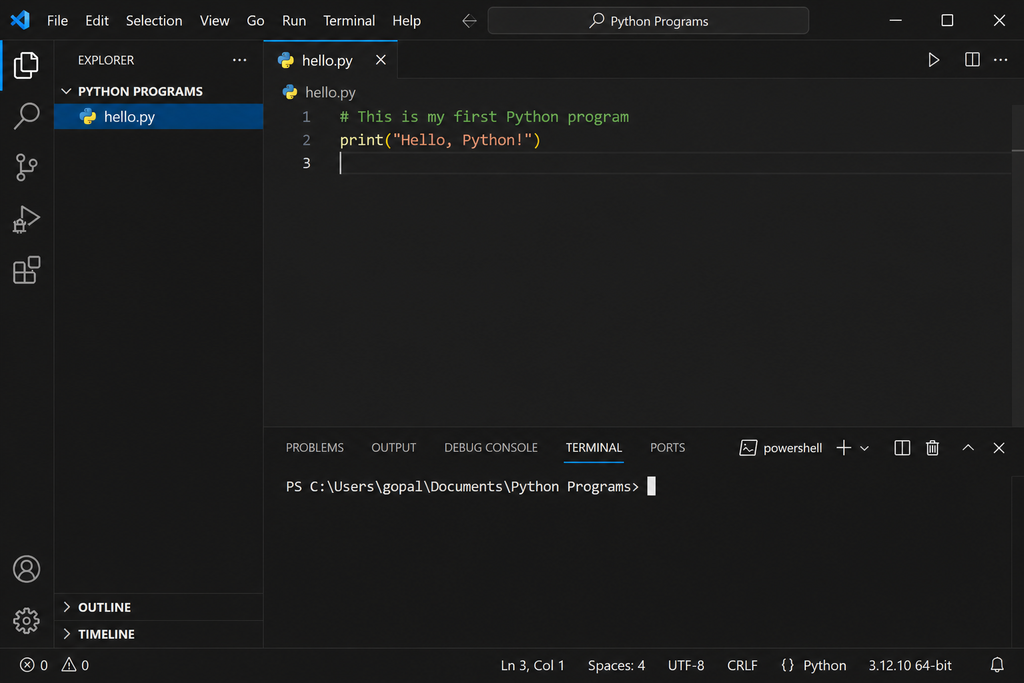
▶️ 10. Run Your First Python Program
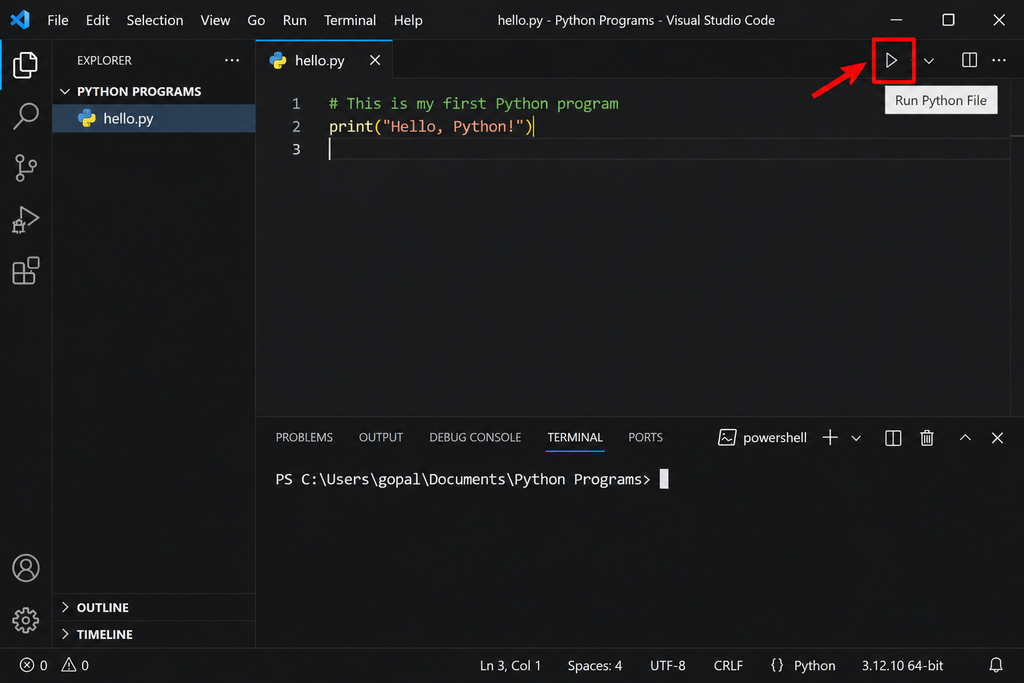
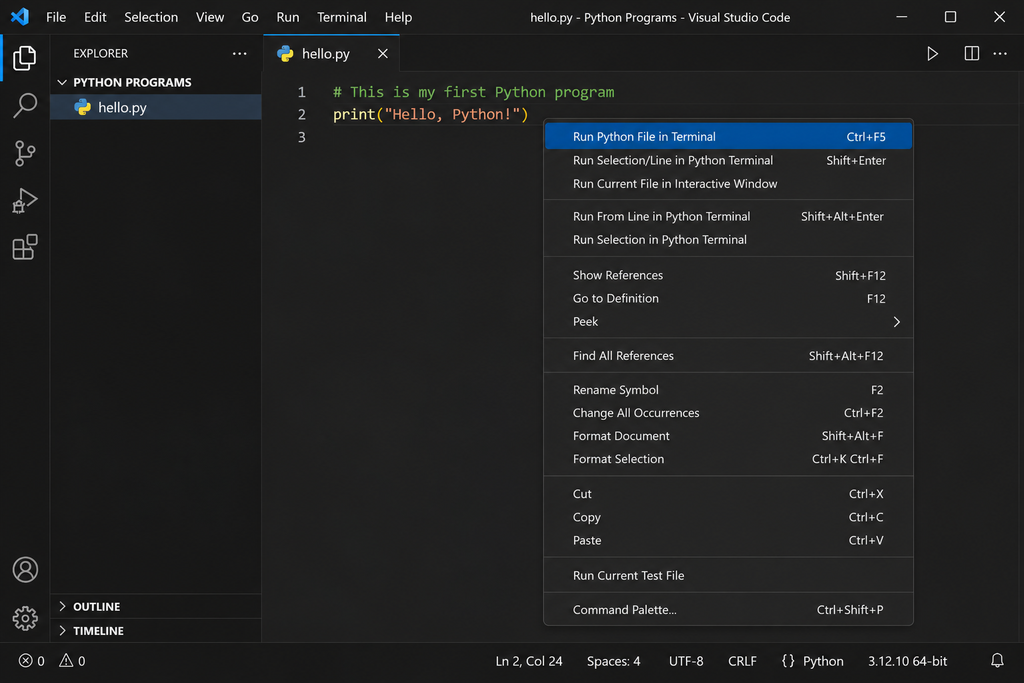
Your first Python program is ready! 🎉 Click the Run ▶ button in the top-right corner of VS Code to execute the program.
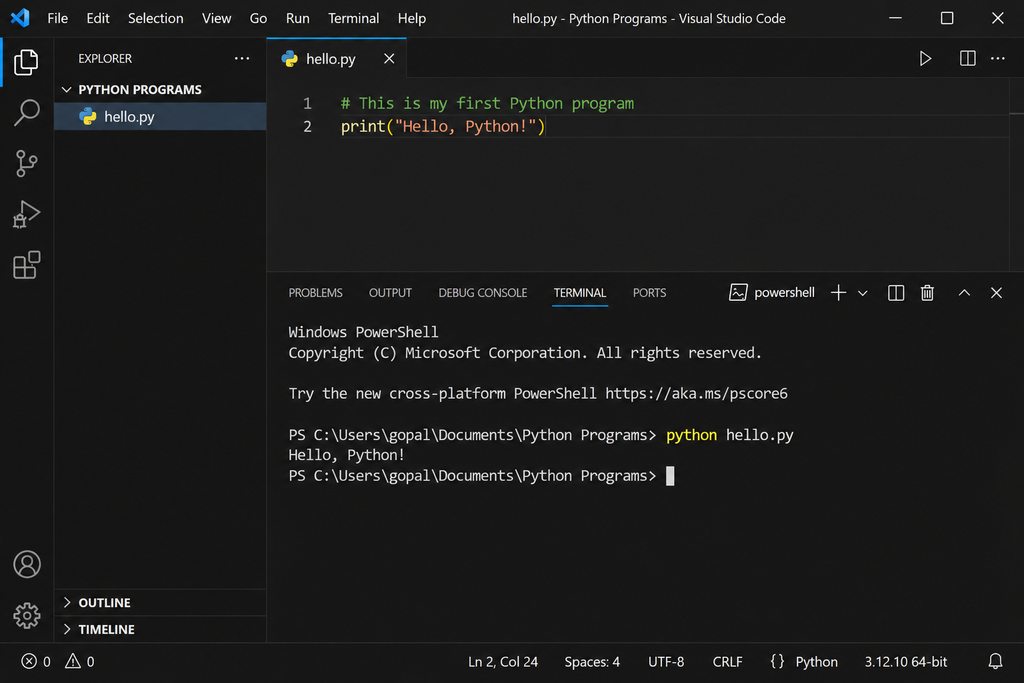
The program will run using your selected Python interpreter, and you will see the result in the Terminal at the bottom of the VS Code window. 💻🐍✨
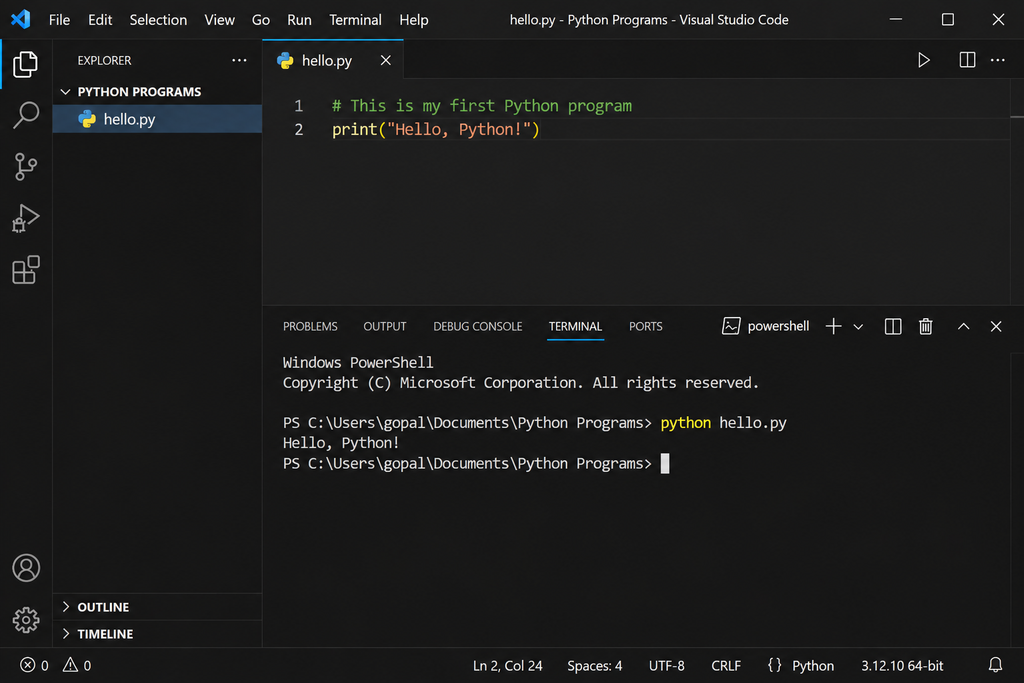
🎉 11. See the Output
Great job! 🚀 After running the program, look at the Terminal at the bottom of VS Code. You should see your program’s output: Hello, Python! 🐍✨
📝 12. Quick Revision
🎯 Let’s quickly recap! You have now learned the complete process of running a Python program using VS Code.
- 💻 Download and install VS Code.
- 🐍 Install the Python extension.
- ⚙️ Select the correct Python interpreter.
- 📁 Create and open a folder for your Python programs.
- ✍️ Create a .py file and write your code.
- ▶️ Run the program using the Run button.
- 🎉 Check the result in the Terminal.
🌟 That’s it! You are now ready to start writing and running your own Python programs in VS Code. Keep practicing and enjoy coding! 🚀🐍