How to Run Python Programs in Thonny – Complete Beginner’s Guide
Writing a Python program is only the first step. To see the output of a Python program, we need to run or execute it using a Python interpreter. Beginners can run Python programs using an IDE such as Thonny, a code editor such as VS Code, or a free online Python compiler.
- What is Thonny?
- Why is Thonny suitable for Python beginners?
- What will the reader learn in this tutorial?
🐍 What is Thonny?
Thonny is a beginner-friendly Python IDE that helps you write, run, and test Python programs easily. It provides a clean interface so beginners can focus on learning Python. Thonny is designed to make learning and writing Python programs easier.
🌱 Why is Thonny Suitable for Python Beginners?
Thonny keeps things simple and easy to understand. You can write your Python code, run it, and immediately see the output in the same window, making it a great choice for your first steps in Python.
🚀 What Will You Learn in This Tutorial?
In this tutorial, you will learn how to download and install Thonny, write your first Python program, save it, run it, and view the output. You will also learn some simple ways to handle common beginner errors.
⬇️ How to Download Thonny
Downloading Thonny is easy and completely free. For safety, always download Thonny from its official website.
👉 Download Thonny from the Official Website (https://thonny.org/)
💡 Tip: Avoid downloading Thonny from unknown or unofficial websites. The official website provides the latest stable release and installers for different operating systems.
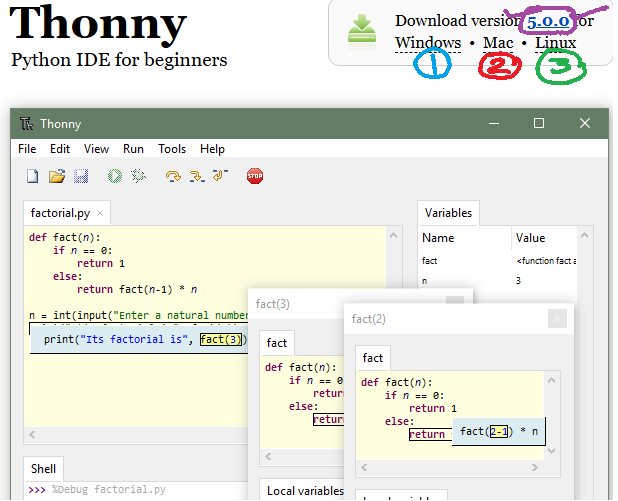
🖥️ Choose the Correct Thonny Installer
After opening the official Thonny download page, choose the installer that matches your computer.
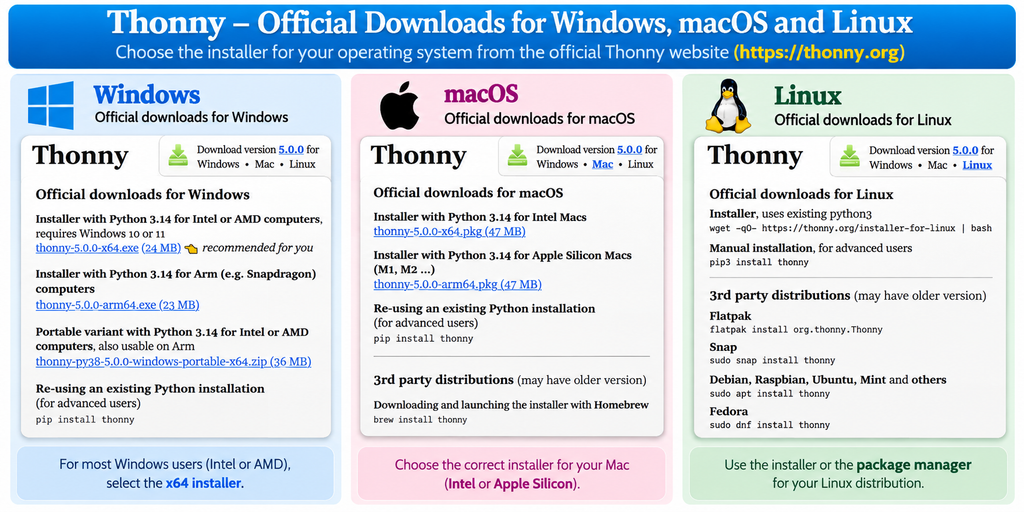
💻 For most Windows computers:
Choose the Windows Installer with Python for Intel or AMD computers.
The official website currently provides separate Windows installers for Intel/AMD (x64) and ARM64 computers.
⚠️ Important: If you are using a normal Windows PC or laptop with an Intel or AMD processor, select the Windows x64 installer.
💻 Install Thonny
After downloading the Thonny installer, the next step is to install it on your computer. The installation process is simple and takes only a few minutes.
💡 In this tutorial, we will demonstrate the installation process on Windows.
1️⃣ Open the Thonny Installer
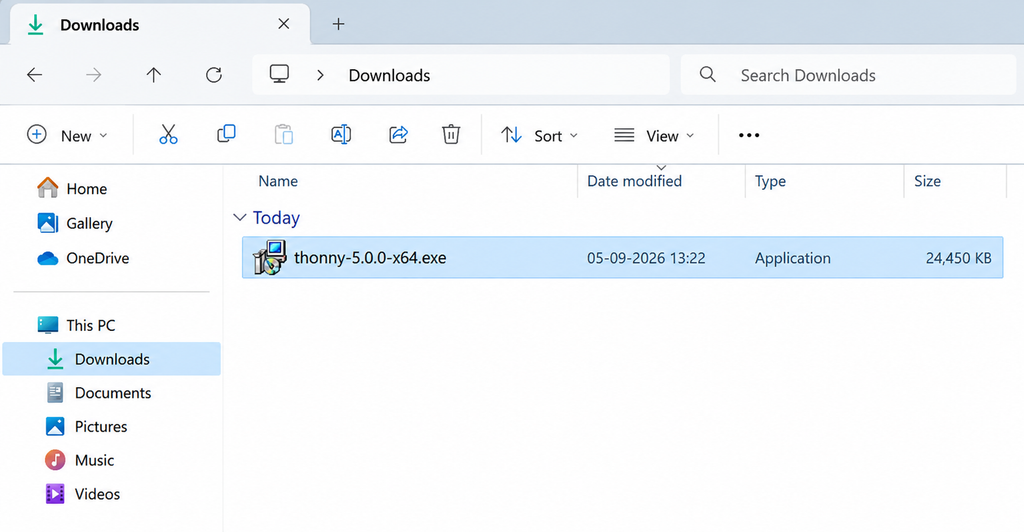
Locate the downloaded Thonny installer in your Downloads folder. Double-click the installer file to begin the installation.
👉 Tip: The installer file will normally have an .exe extension on Windows.
2️⃣ Start the Installation
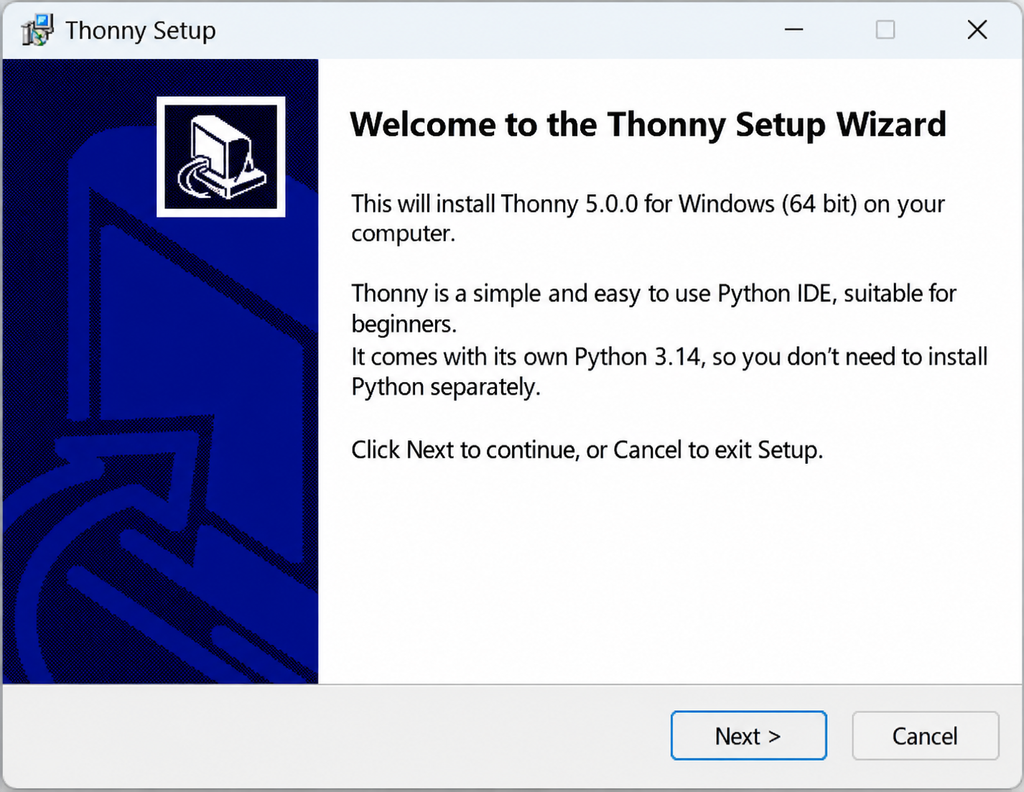
After opening the installer, the Thonny Setup window will appear. Follow the instructions displayed by the setup program to continue.
Click Next or the appropriate button shown by the installer to proceed through the setup.
3️⃣ Complete the Installation
Continue through the installation steps and wait while Thonny is installed on your computer. When the installation is complete, you can launch Thonny and start writing Python programs.
🚀 You’re ready to start Python! Once Thonny is installed, open it to write and run your first Python program.
🎉 Thonny is now installed!
Let’s open Thonny and take a quick look at its interface.
🚀 Part 3 – Open Thonny for the First Time
6. Start Thonny
After installing Thonny, you can open it from the Windows Start menu. Follow these simple steps:
- Open the Windows Start menu.
- Search for Thonny.
- Click Thonny to launch the IDE.
💡 Tip: You can also create a shortcut for Thonny on your desktop for quick access.
👀 Take a Look at the Thonny Interface
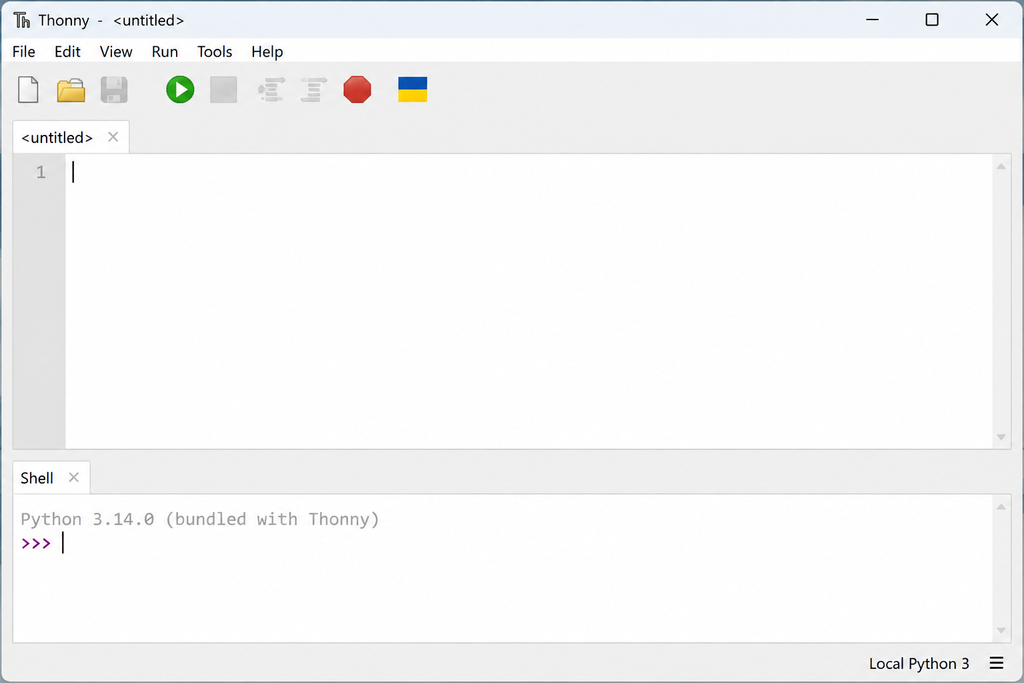
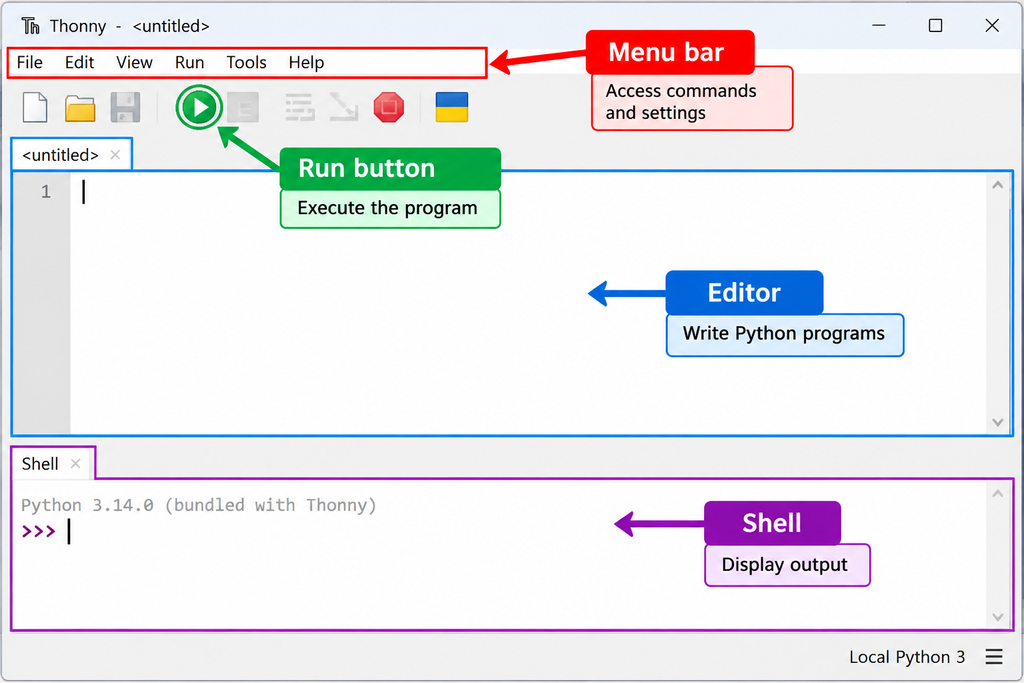
When Thonny opens, you will see a simple interface designed especially for writing and running Python programs. Don’t worry if the different areas look unfamiliar at first—we will explore them step by step.
The screenshot above shows the main Thonny window. In the next section, we will identify the important parts of this interface.
🌟 Don’t worry! You don’t need to understand everything on the screen right now. We will learn each important part before writing our first Python program.
🐍 Part 4 — Write Your First Python Program
Now that you are familiar with the basic Thonny interface, it is time
to write your first Python program.
Don’t worry—your first program will be very simple!
🎯 Our first goal: Write a Python program that displays Hello, World! on the screen.
7. Enter Your First Python Code
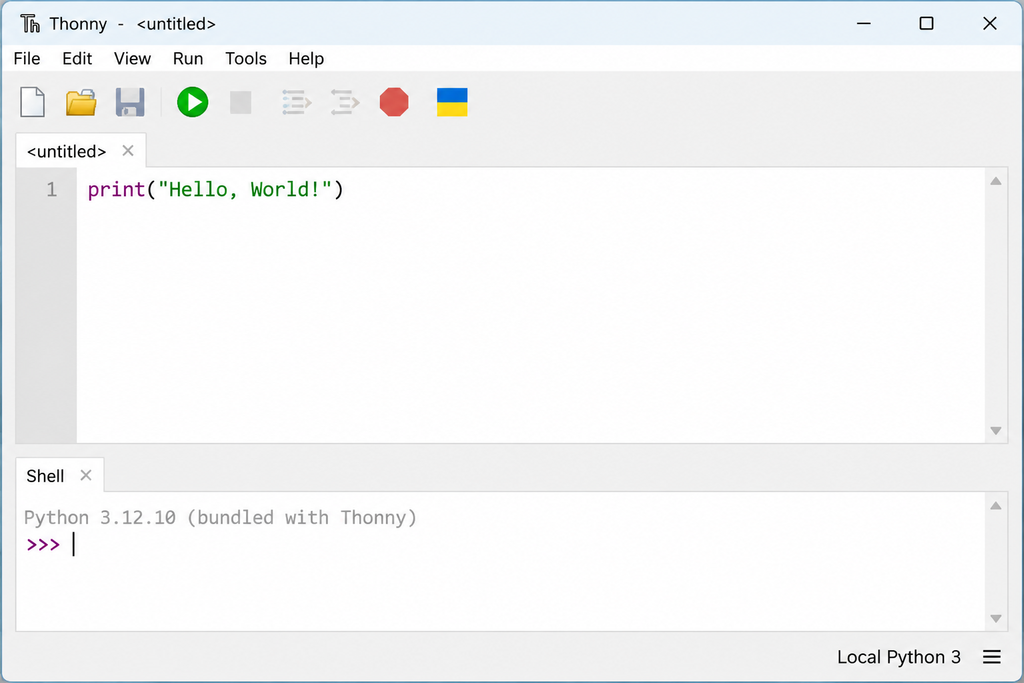
Click inside the Editor area of Thonny and type the following Python statement:
print("Hello, World!")Make sure that you type the statement exactly as shown above. Python is sensitive to spelling, punctuation, quotation marks, and other characters.
The screenshot below shows the print() statement entered in the Thonny Editor.
▶️ Part 5 — Run the Python Program
Your first Python program is now ready. Let’s run it and see what happens. In Thonny, running a program is as simple as clicking the Run button.
🎯 Goal:
Run print("Hello, World!")
and see the result in the Thonny Shell.
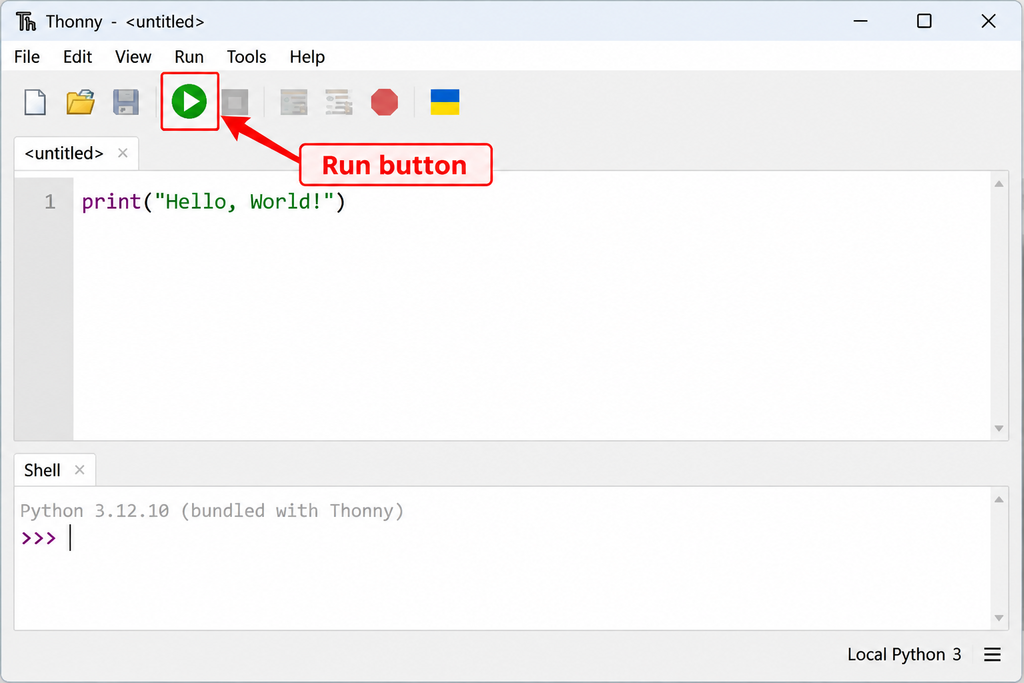
8. Click the Run Button
Look at the toolbar at the top of the Thonny window. Click the green Run button ▶ to execute your Python program.
Thonny will execute the code written in the Editor and display the result in the Shell area.
The screenshot below shows the location of the Run button in Thonny.
💾 Save the Program When Prompted
If this is the first time you are running the program, Thonny may ask you to save the file. Choose a suitable location and give your Python file a name, such as:
hello.py💡 Tip: Always save your Python programs with the .py extension.
🎉 See Your Program Run!
After running the program, look at the Shell at the bottom of the Thonny window. You should see:
Hello, World!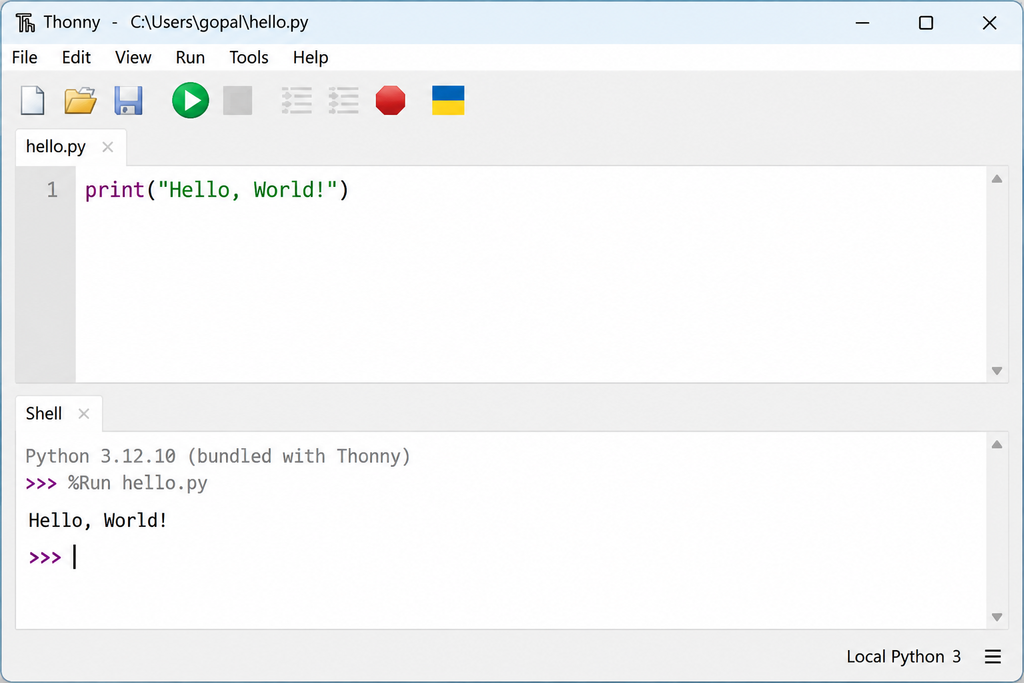
The output of your program appears in the Shell, confirming that Python has successfully executed your code.
🌟 Congratulations! You have just run your first Python program using Thonny.
💬 Part 8 — A Slightly More Interesting Program
Now that you have successfully run your first Python program, let’s make it a little more interesting. This time, the program will ask the user for their name and then display a friendly greeting.
🎯 Goal: Learn how to accept information from the user using Python’s input() function.
11. Write the Program
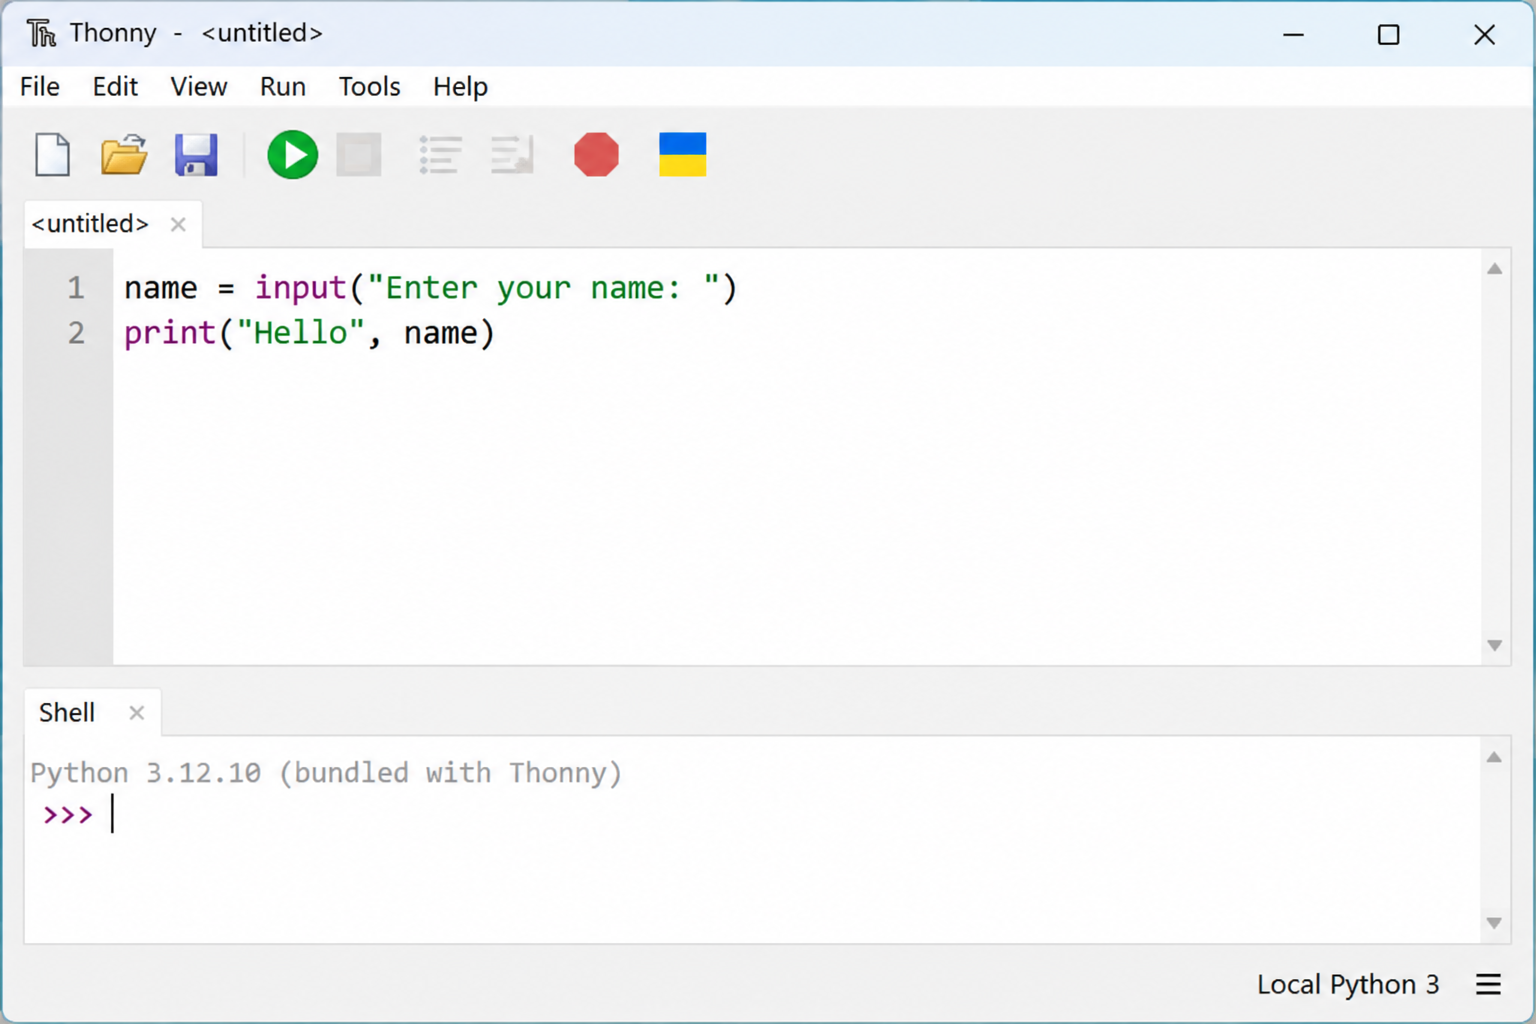
Click inside the Editor and enter the following code:
name = input("Enter your name: ")
print("Hello", name)
The screenshot below shows the program entered in the Thonny Editor.
🔍 How Does This Program Work?
The input() function asks the user to enter some information. The value entered by the user is stored in the variable name.
The second line uses print() to display a greeting containing the user’s name.
💡 In simple words:
input() gets information from the user,
while print() displays information on the screen.
▶️ Run the Program
Click the Run ▶ button in Thonny. The Shell will ask you to enter your name.
For example, enter:
Enter your name: GopalAfter pressing Enter, Python will display:
Hello Gopal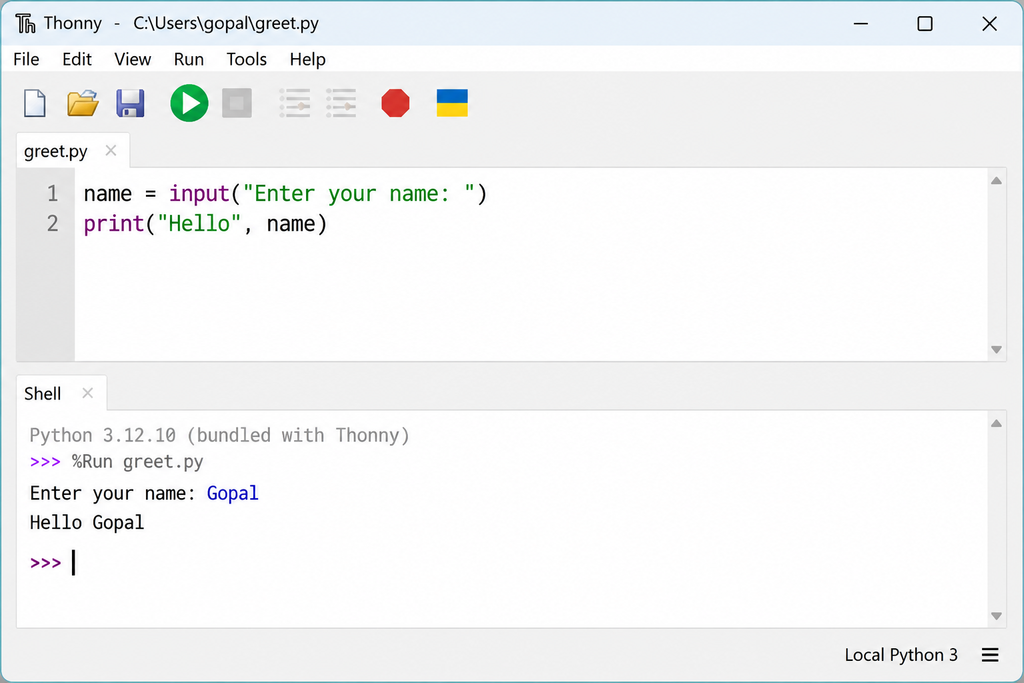
The screenshot above shows the user entering a name and the resulting output in the Thonny Shell.
🌟 Great job! Your program can now interact with the user and respond with personalized output.
Try below program:
a = 10
b = 20

sum = a + b

print("Sum =", sum)🎉 Happy Coding! 🎉
You have taken your first steps toward writing and running Python programs with Thonny. Keep practicing, keep exploring, and keep creating!
✨ Code. Learn. Create. Repeat. ✨